Members and roles
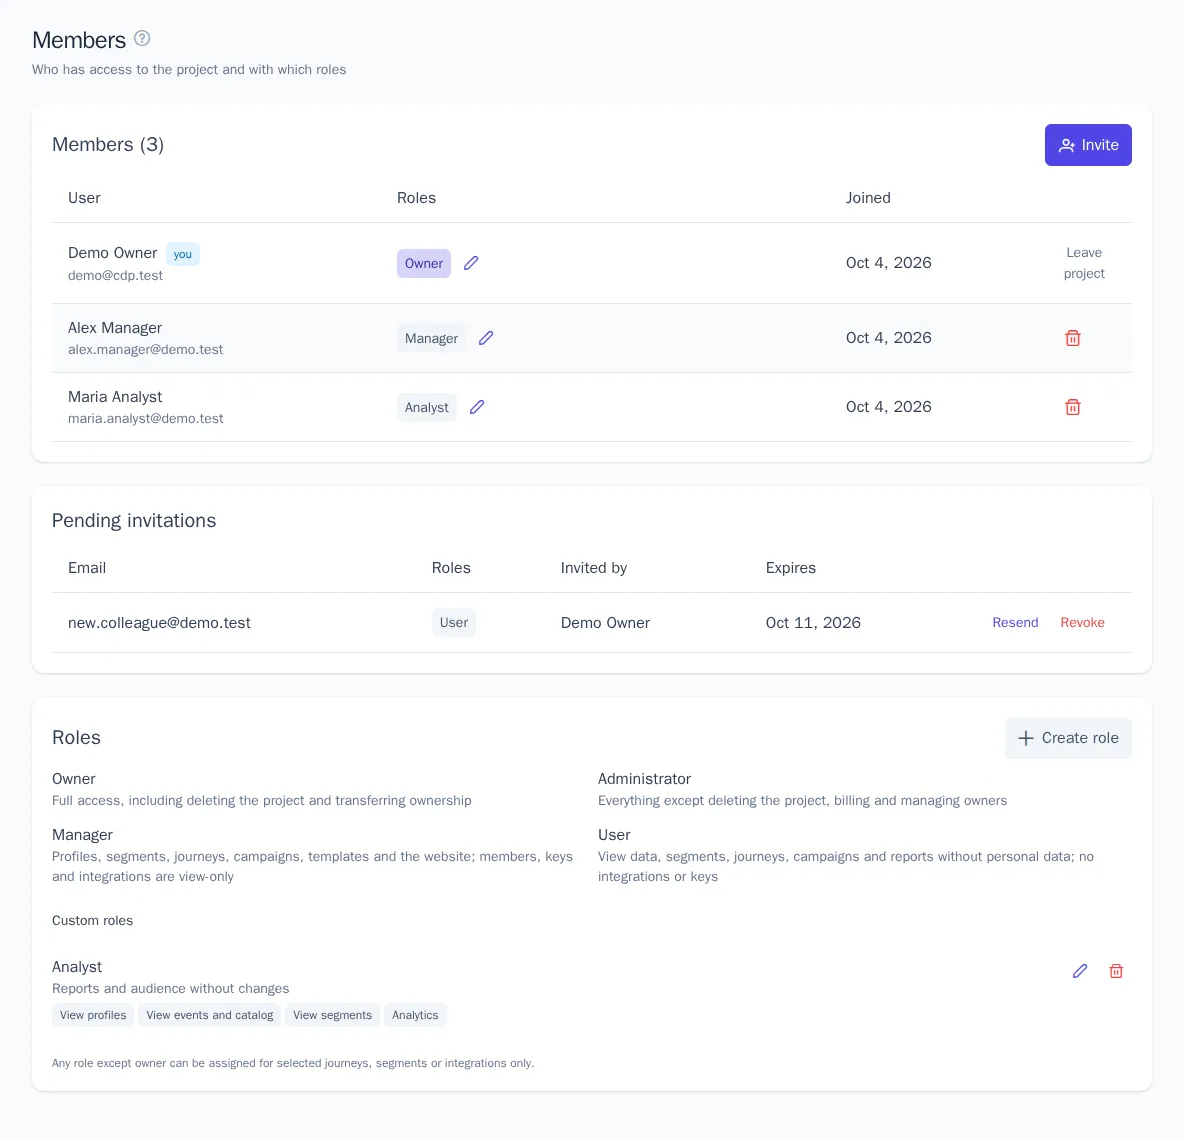
The Members section shows who has access to the project and what each person can do. Here you invite colleagues by email, assign roles, create custom roles, and limit access to specific journeys, segments, or integrations.
The section is in the menu under Settings → Members. All project members can see the list; Owner and Administrator can invite people, change roles, and remove members.
Invite a member
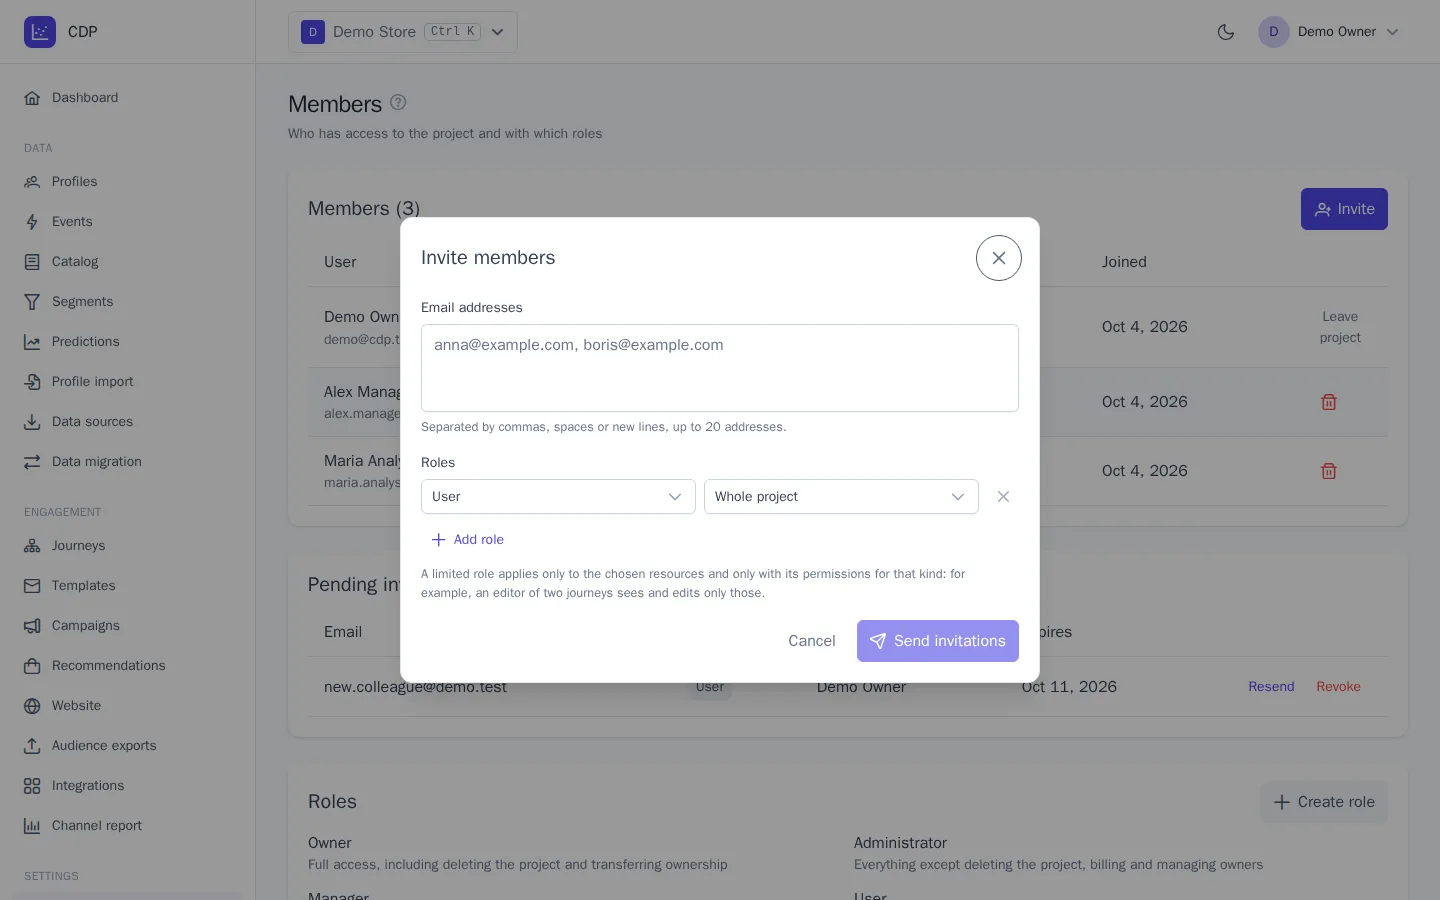
- Click Invite.
- In the Email addresses field, list the addresses separated by commas, spaces, or line breaks, up to 20 at a time.
- In the Roles block, choose a role. Use Add role to grant several roles at once.
- Click Send invitations.
The invitee gets an email with a link. If they already have an account, they sign in and click Accept. If not, they sign up using the link. An invitation can only be accepted with the account whose email it was sent to. Signed-in users also see the invitation on the My projects page and in the project switcher.
Pending invitations
Unanswered invitations appear in the Pending invitations block: who it was sent to, with which roles, who sent it, and when it expires.
- Resend sends a new email with a new link; the old link stops working.
- Revoke means the link in the email no longer opens the project.
An invitation is valid for 7 days. Accepted, declined, revoked, and expired invitations no longer work. The number of invitations per hour is limited: if you reach the limit, try again in an hour.
System roles
| Capability | Owner | Administrator | Manager | User |
|---|---|---|---|---|
| View profiles, events, segments, journeys, templates, campaigns, analytics | ✓ | ✓ | ✓ | ✓ |
| Unmasked personal data (email, phone) | ✓ | ✓ | ✓ | |
| Edit profiles, segments, journeys, templates, event catalog | ✓ | ✓ | ✓ | |
| Publish journeys, launch campaigns, send messages manually | ✓ | ✓ | ✓ | |
| Recommendations, website widgets and domains, audience exports, imports | ✓ | ✓ | ✓ | |
| View integrations and API keys | ✓ | ✓ | ✓ | |
| Export and delete profiles | ✓ | ✓ | ||
| Manage integrations and API keys | ✓ | ✓ | ||
| Invite members and manage roles | ✓ | ✓ | ||
| Project settings, messaging rules, prediction settings, audit log | ✓ | ✓ | ||
| Plan and usage, project deletion, ownership transfer | ✓ |
All roles can see the member list. If a person has several roles, their permissions add up.
Rules for owners:
- a project always has at least one Owner: the last owner can't leave or remove this role from themselves;
- only an owner can assign or remove the Owner role;
- nobody can grant permissions broader than their own: for example, an administrator can't assign the owner role.
Change roles or remove a member
- In the member's row, click the pencil icon next to their roles.
- Add or remove roles and click Save.
To remove a member, click the trash icon in their row. Access is revoked immediately: if the person is working in the project at that moment, they see a notification and return to the project list. To leave yourself, click Leave project in your row. You can only come back with a new invitation.
Custom roles
If the system roles don't fit, create your own: for example, a "Content manager" who only edits email templates.
- In the Roles block, click Create role.
- Enter a Name and, optionally, a Description.
- Select permissions by group: profiles, events, segments, journeys, campaigns, templates, and so on.
- Click Save.
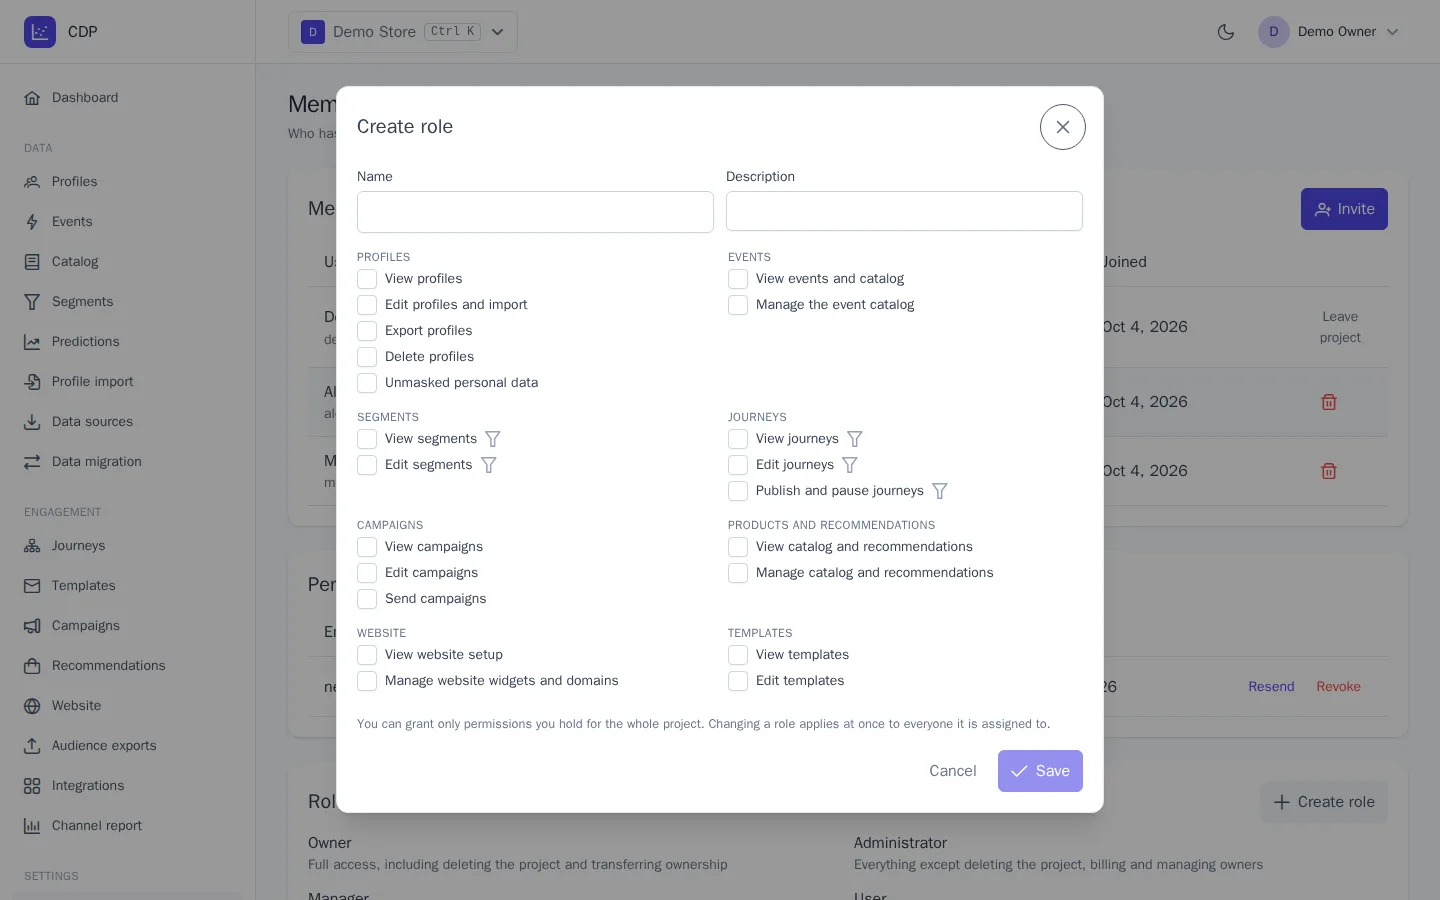
You assign a custom role the same way as a system role: when inviting or when editing a member's roles, in the Custom roles group.
- You can only grant permissions that you have for the whole project.
- Changes to a role take effect immediately for everyone it's assigned to.
- You can't delete a role that's assigned to members or included in a pending invitation: remove it from members or revoke the invitation first.
Access to specific journeys, segments, or integrations only
Any role except Owner can be granted for selected resources instead of the whole project. For example, for a contractor who only runs the "Abandoned cart" journey.
- When inviting or changing roles, choose a role.
- Next to it, instead of Whole project, choose Only journeys…, Only segments…, or Only integrations….
- Select the resources and save.
How the restriction works:
- Only permissions of that kind apply. A Manager on two journeys can view, edit, and publish only those journeys; this assignment doesn't open profiles, segments, or other sections.
- The role must allow at least viewing the selected resources.
- Lists show only accessible resources; for this member, the others don't seem to exist.
- Creating new journeys, segments, and integrations, as well as creating journeys from templates, requires project-wide permissions.
- In the journey editor, the member sees the names of all the project's segments, templates, and integrations so they can pick them in steps, but can only open and edit the ones they have access to.
Good to know
- API keys don't depend on member roles: a key's permissions are set when you create it. See API keys.
- All invitations, acceptances, role changes, and member removals are recorded in the audit log. See Project settings, plan, and audit.
- An owner or administrator can require two-factor authentication for all members in the project settings. See Profile and security.