Brand and domains
You can offer OneTrace.pro to your clients under your own name, colors, and domain. The Brand page is for partners who work this way: here you set up the interface appearance, domains, sign-up mode, and project limit, and you can see journey template statistics across all of the brand's projects.
Only brand administrators can access this page; they're assigned by the platform provider. Open it from the menu under your name in the top-right corner: the Brand item. Regular project members don't see this item.
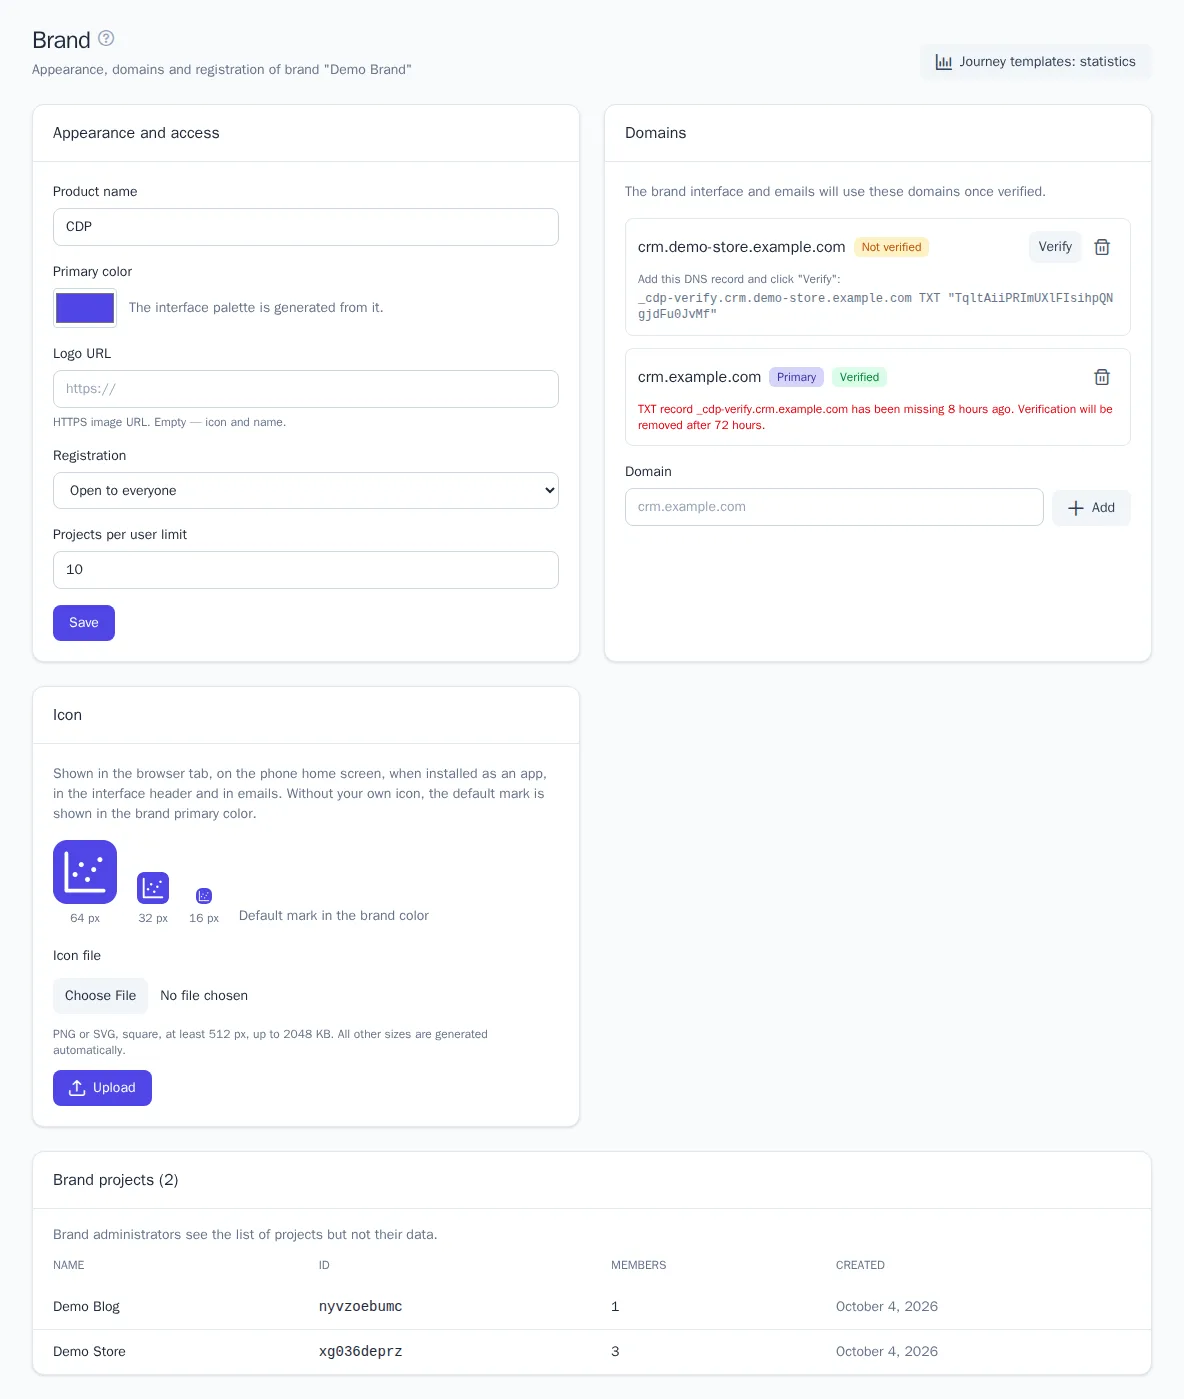
Appearance and access
- Open Brand.
- In the Appearance and access block, fill in the fields:
- Product name: shown in the menu header, the browser tab title, system emails, and the help center;
- Primary color: the interface palette is generated from it automatically, including buttons, links, and selected menu items;
- Logo URL: an HTTPS image URL. If you leave it empty, an icon and the product name are shown instead of a logo;
- System email sender address: invitations, password resets, and notifications are sent from this address. Its domain must be verified in Sending domains in one of the brand's projects. If you leave it empty or the domain's verification is revoked, emails come from the platform's address, but with your product name;
- Registration: Open to everyone or Invitation only;
- Projects per user limit: how many projects one person can create.
- Click Save.
All users on the brand's domains will see the changes after they reload the page. A horizontal logo at least 64 px tall on a transparent background works best: it's displayed 32 px tall in both the light and dark themes.
Sign-up mode. With Open to everyone, any visitor can sign up and create their own project. With Invitation only, there's no Sign up link on the sign-in page, and an account can only be created through an invitation to an existing project.
Icon
The icon appears in the browser tab, on the phone home screen, when OneTrace.pro is installed as an app, in the interface header and in system emails. Until you upload your own, the interface mark is shown in the brand primary color, and it changes with the color.
To use your own icon, choose a file in the Icon block and click Upload:
- PNG or SVG, square, at least 512 × 512 px, up to 2 MB;
- all other sizes, from 16 px for the tab to 512 px for the app, are generated automatically;
- the SVG must not contain scripts or links to external files.
Restore the default mark removes your icon. Browsers pick up the new icon the next time the page is opened.
Domains
A custom domain (for example, crm.example.com) lets your clients use the interface at your address. Links in emails also use this domain: invitations, unsubscribe links, and open and click tracking. The tracker code in the Website section is built with the address of the domain the interface is opened on.
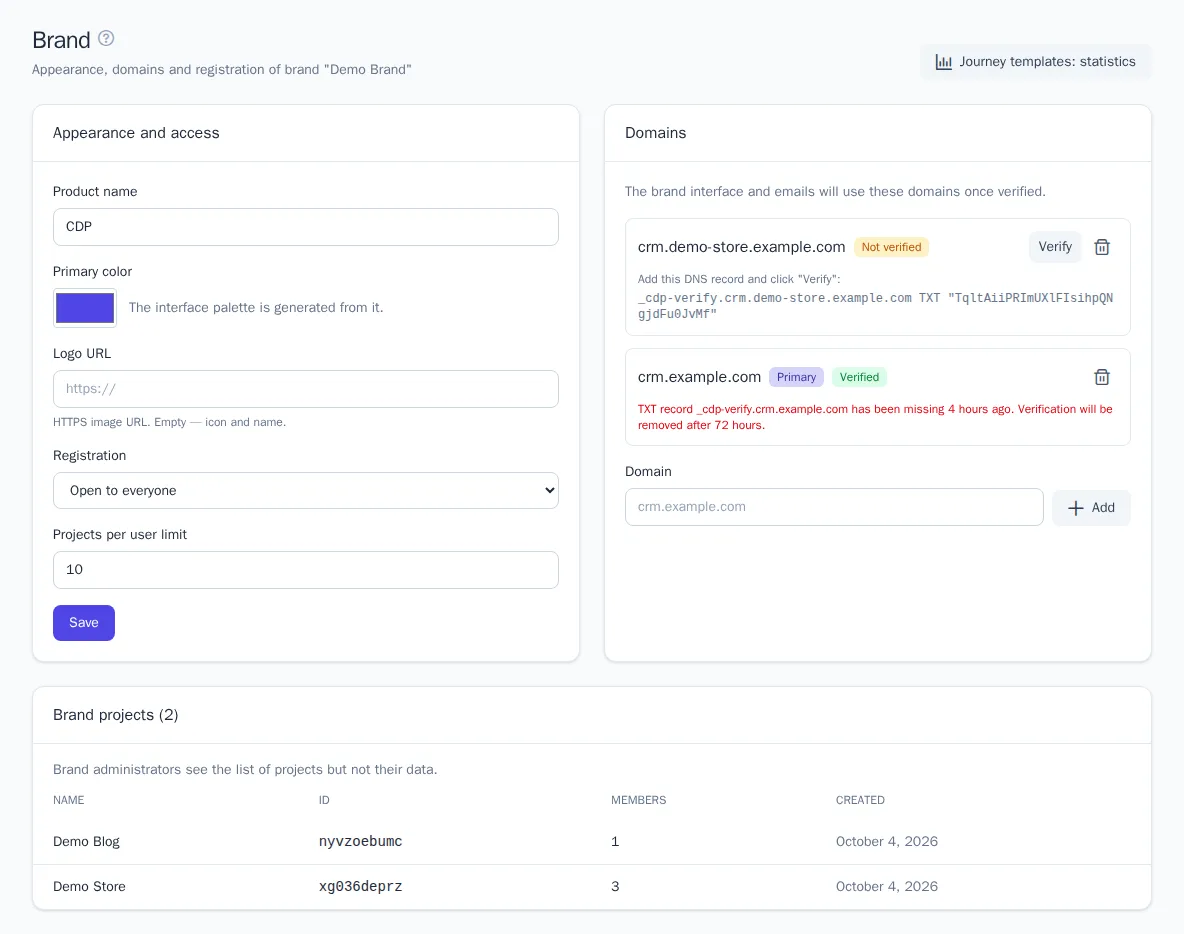
Connect a domain
- Point the domain to the platform server. Ask the platform provider for the address to use in the DNS record.
- In the Domains block, enter the domain in the Domain field and click Add.
- A DNS record like
_cdp-verify.crm.example.com TXT "…"appears under the domain. Add it at your DNS provider. - Click Verify. If the record is found, the domain is marked Verified. DNS updates can take up to an hour, so if verification fails, try again later.
An HTTPS certificate for a verified domain is issued automatically on the first request.
Primary domain
If you have several verified domains, click Make primary next to the one you want. Links in emails and redirects between brands use the primary domain. If no primary domain is selected, the first verified domain is used.
Good to know about domains
- Don't delete the TXT record after verification. The platform checks it once a day. If the record disappears, the domain shows a warning with how much time is left; by default, after 72 hours verification is removed, the interface stops opening on the domain, and brand administrators get an email. Restore the record and click Verify again.
- Removing a domain (the trash icon) immediately disables the interface on it. Warn your users in advance.
- Projects belong to the brand on whose domain they were created. If a user opens another brand's project, they're automatically redirected to that brand's domain.
Brand projects
At the bottom of the page is a list of all the brand's projects: name, ID, number of members, and creation date. A brand administrator sees only the list, not the project data. To work in a project, you need to be a member.
Journey template statistics
The Journey templates: statistics button in the top-right corner of the brand page opens a summary: which journey templates are used across all of the brand's projects and how well the journeys created from them perform.
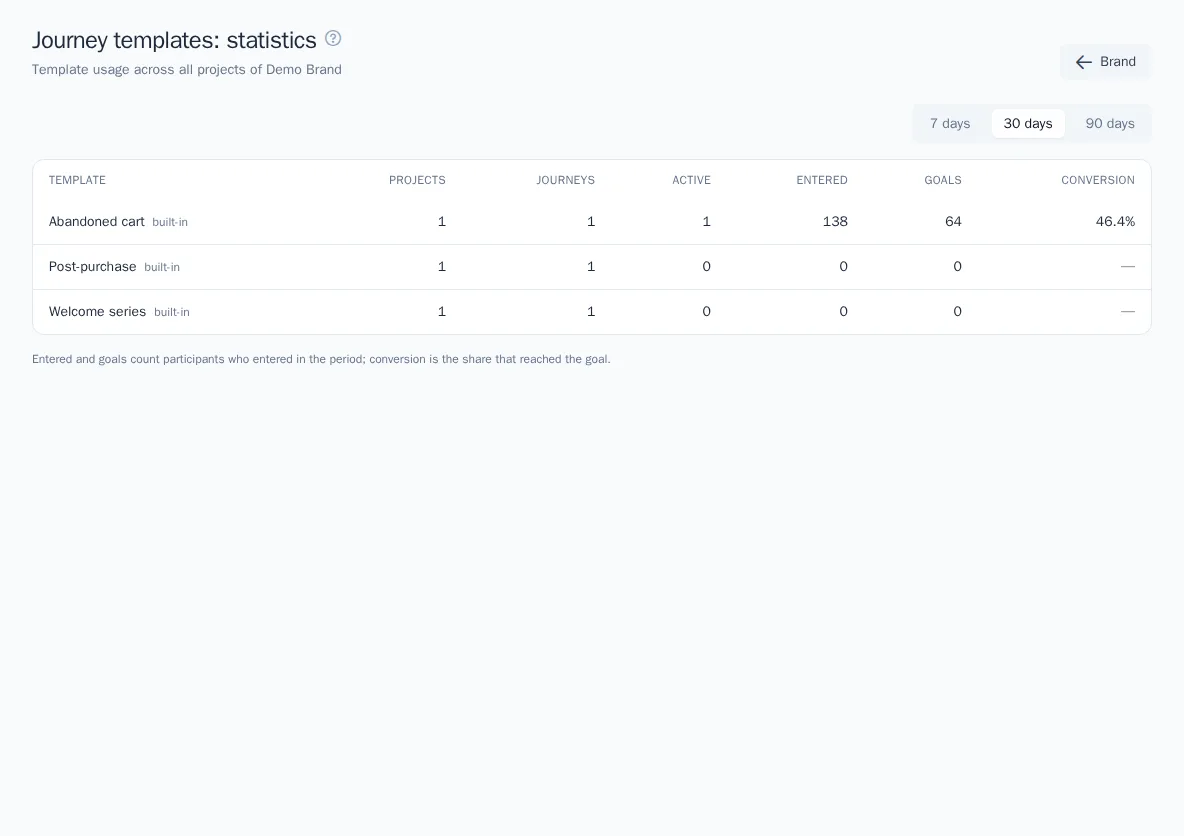
For each template you'll see:
| Column | What it means |
|---|---|
| Template | name and source: built-in, brand, or from file |
| Projects | how many projects use the template |
| Journeys | how many journeys were created from the template |
| Active | how many of them are currently running |
| Entered | how many customers entered these journeys during the period |
| Goals | how many of them reached the journey goal |
| Conversion | the share that reached the goal |
Use the 7, 30, and 90 days buttons to switch the period. These statistics help you decide which scenarios to recommend to your clients: for example, if "Abandoned cart" converts noticeably better than other templates.
Brand templates
You can save a successful journey from any project you belong to as a brand template: open the journey and click Save as brand template. The template appears in the template library of every brand project, and clients can create their own journey from it. For details, see Journeys.
Also keep in mind
- Invitation and password reset emails are sent with the brand's name and styling.
- The platform provider assigns the plan with limits for brand projects; to see how clients view them, see Project settings, plan, and audit.