Getting started
OneTrace.pro collects what your customers do on your website and in your app, combines it into profiles, splits your audience into segments, and runs automated message journeys. This article explains how to sign in, create your first project, find your way around the interface, and where to start setting things up.
Signing in and signing up
- Go to https://cdp.onetrace.pro, enter your email and password, and click Sign in.
- If you don't have an account yet, click Sign up. If there is no such link, sign-up is by invitation only: ask a colleague to invite you to a project (see Members and roles).
- After signing up, confirm your email using the link in the message we send you.
- If you have two-factor authentication turned on, enter the code from your authenticator app or one of your recovery codes.
Forgot your password? Click Forgot password? on the sign-in page and we'll email you a reset link.
After you sign in, you land in the project you opened last. If you don't have any projects yet, the My projects page opens.
Projects
A project is a separate workspace with its own data: profiles, events, segments, journeys, integrations, and API keys. Usually one project matches one website or store brand. Data never overlaps between projects.
The My projects page lists every project you belong to, your role in each, and when you last visited it. Invitations from colleagues also appear here, and you can accept or decline them.
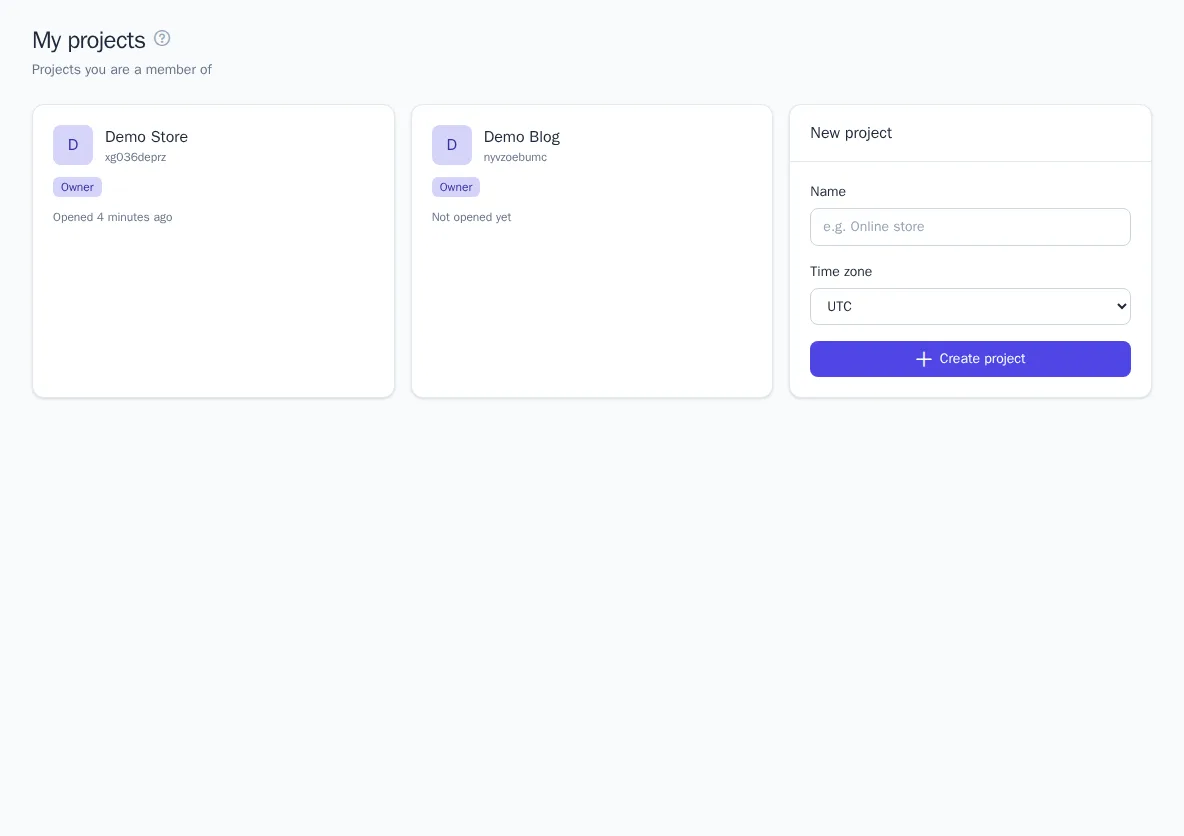
Create a project
- Open My projects (in the menu under your name in the top-right corner).
- In the New project card, enter a name, for example "Online store".
- Choose a time zone. Your browser's time zone is selected by default. It affects daily reports, campaign schedules, and quiet hours.
- Click Create project.
You become the project owner. The number of projects per user may be limited. If you reach the limit, you'll see a message.
Switching between projects
The current project's name appears in the top bar. Click it or press Ctrl K (⌘ K on a Mac) to open the project switcher:
- start typing a name to filter the list;
- use the arrow keys to select a project and press Enter;
- click the star to mark favorite projects;
- at the bottom you'll find the All projects and New project links, plus a count of pending invitations.
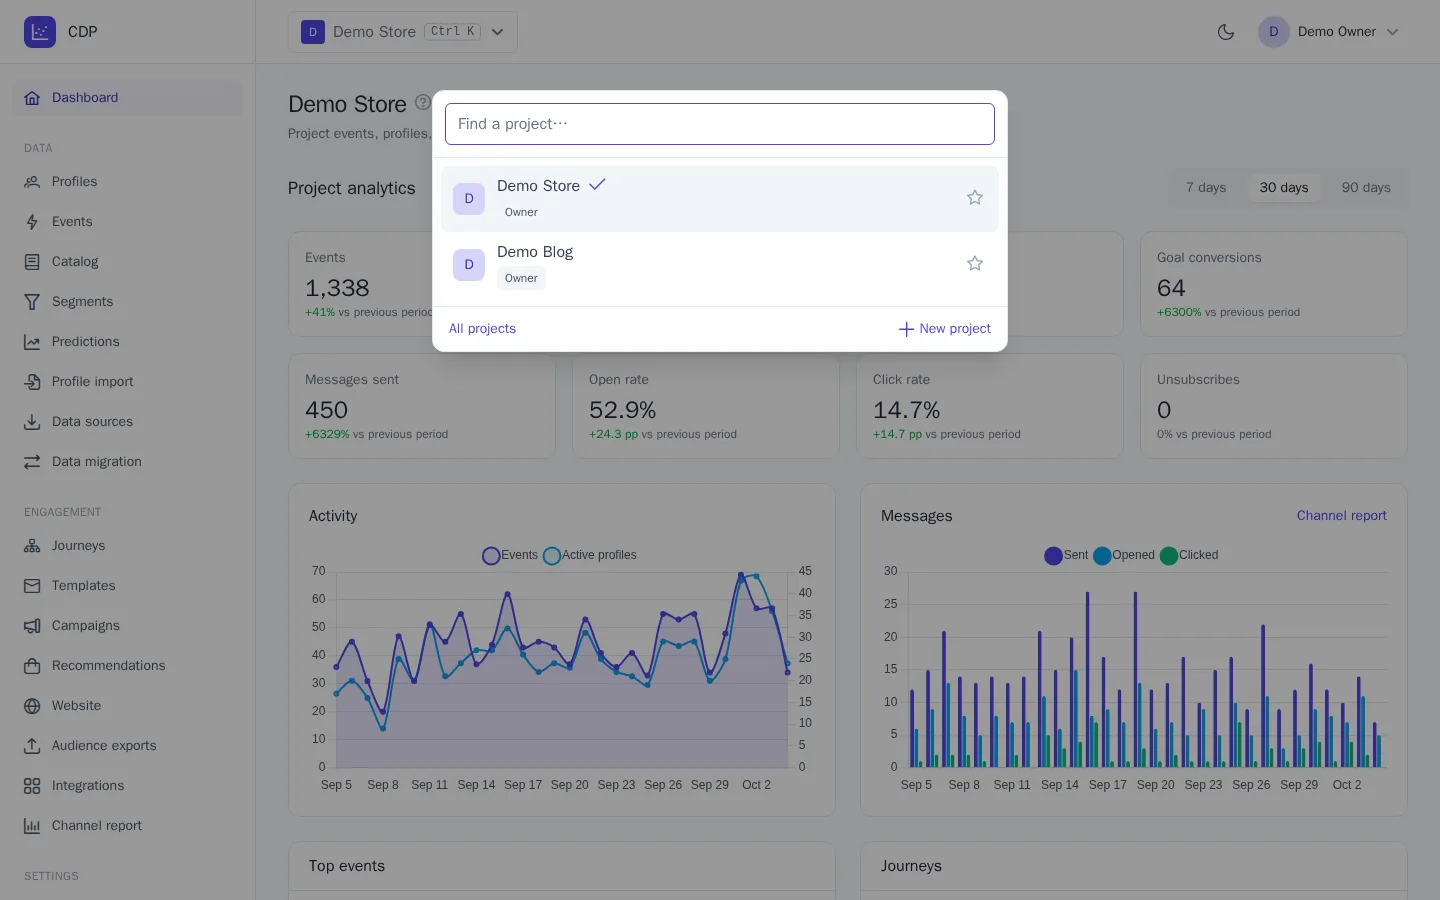
When you switch projects, the same section opens: for example, from one project's segments you go to the other project's segments. If you don't have access to that section in the new project, the dashboard opens instead. You can open different projects in separate browser tabs at the same time.
Menu
The project menu is on the left. You only see the items you have permissions for.
| Section | What's inside |
|---|---|
| Dashboard | Project overview |
| Data | Profiles, Events, Catalog, Segments, Predictions, Data sources, Data migration |
| Engagement | Journeys, Templates, Campaigns, Recommendations, Website, Audience exports, Integrations, Channel report |
| Settings | Members, API keys, Plan and usage, Audit log, Messaging rules, Project settings |
| Help | This help center |
The menu under your name contains My projects, Profile, Security, and Sign out. Brand administrators also see a Brand item there.
Dashboard
The dashboard is the project's home page. The Project analytics block shows metrics for the last 7, 30, or 90 days compared with the previous period: events, active and new profiles, goal conversions, messages sent, open rate, click rate, and unsubscribes. Below are activity and message charts, top events, and journey results.
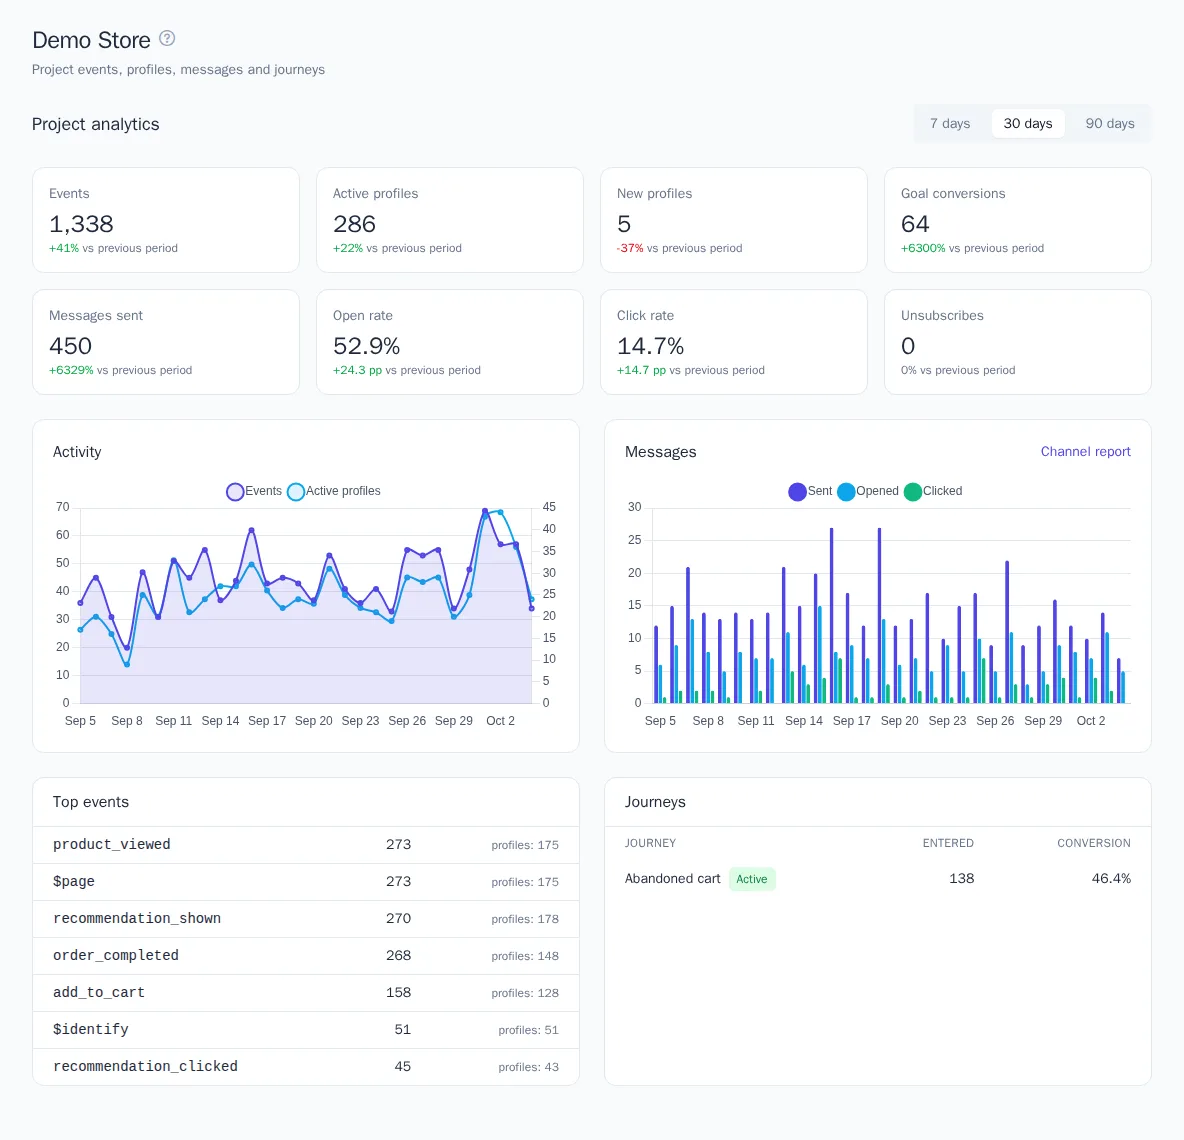
If the project is approaching its plan limits, a warning appears at the top of the dashboard with a link to the Plan and usage page (see Project settings, plan, and audit).
Language and theme
- Interface language is set on the Profile page in the Interface language block. Before you sign in, you can choose a language at the bottom of the sign-in page.
- Dark mode is turned on with the moon button in the top bar (Toggle theme). By default, the theme follows your operating system setting. If you choose one manually, your browser remembers it.
Getting help
- The Help item at the bottom of the menu opens the list of articles with search.
- The ? icon next to a page title opens the article about that section in a new tab.
Where to start
- Connect your website. Install the tracker code in the Website section. See Connecting your website. If your server sends the events, see Server integration.
- Check your events. Open Events and make sure that page views, add-to-cart events, and purchases are coming in. See Events and the event catalog.
- Create segments. For example, "Abandoned cart" or "VIP customers". See Segments.
- Connect channels such as email, SMS, and messengers in the Integrations section (Integrations and channels).
- Launch a journey, for example an abandoned cart email. See Journeys. For one-time promotions, use Campaigns.
- Invite your colleagues and assign them roles. See Members and roles.
To keep your account secure, turn on two-factor authentication. See Profile and security.