Connecting your website
The tracker is a small script on your website's pages. It counts page views, sends customer actions (product views, cart, orders, sign-ins), shows recommendation widgets, and subscribes visitors to Web Push. Everything you need to connect it is in Engagement → Website.
The section is open to all project members. Owner, Administrator, and Manager can change website domains and widgets. Owner and Administrator can create a website key.
Install the tracker
The Installation tab has three steps.
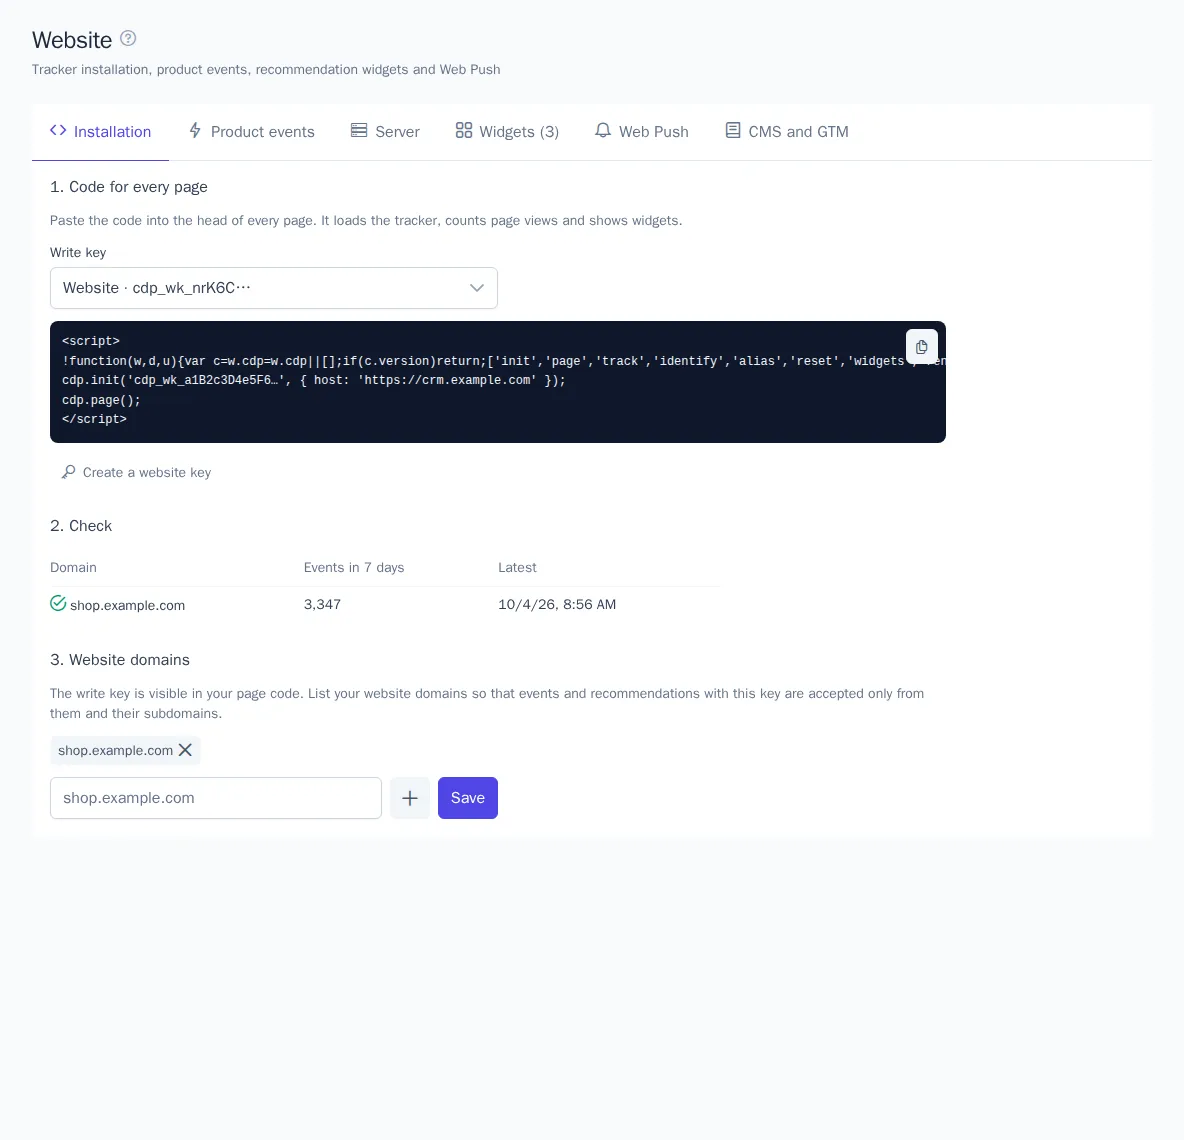
1. Code for every page
- In the Write key field, choose a key. If there are no keys, click Create a website key.
- Copy the code with the copy button.
- Paste it into the
<head>of every page on your website, usually in the shared header template.
The code looks like this (the address and key are already filled in on the page):
<script>
!function(w,d,u){var c=w.cdp=w.cdp||[];if(c.version)return;['init','page','track','identify','alias','reset','widgets','renderRecommendations'].forEach(function(m){c[m]=c[m]||function(){c.push([m].concat([].slice.call(arguments)))}});var s=d.createElement('script');s.async=1;s.src=u;d.head.appendChild(s)}(window,document,'https://cdp.onetrace.pro/tracker/cdp.js');
cdp.init('cdp_wk_…', { host: 'https://cdp.onetrace.pro' });
cdp.page();
</script>
The script loads asynchronously and doesn't slow down your website. You can call cdp.track() right after the code: the calls wait for the tracker to load. The tracker gives each browser a persistent visitor ID (the cdp_aid cookie, valid for a year) and saves the visit's UTM tags.
The write key is visible in your page code, and that's fine: it can only send events. If keys in the list are unavailable, they were created before this section existed and can't be shown in full. Create a new website key or take the key from the code already on your website.
2. Check
After installing, open any page of your website. Within a few seconds, a table appears in the Check block: Domain, Events in 7 days, and the time of the latest event. Until events arrive, the section shows Waiting for the first events. The check refreshes itself every 10 seconds while the section is open.
3. Website domains
To stop other websites from sending events on behalf of your project and pulling recommendations, list your website's domains:
- Enter a domain, for example
shop.example.com, and click +. To add a domain from the check table, click Add to domains. - Click Save.
A domain also allows its subdomains: shop.com lets www.shop.com through. While the list is empty, the key works on any website (No restriction). Requests from your server aren't affected by this restriction. You can list up to 20 domains.
Customer sign-in and sign-out
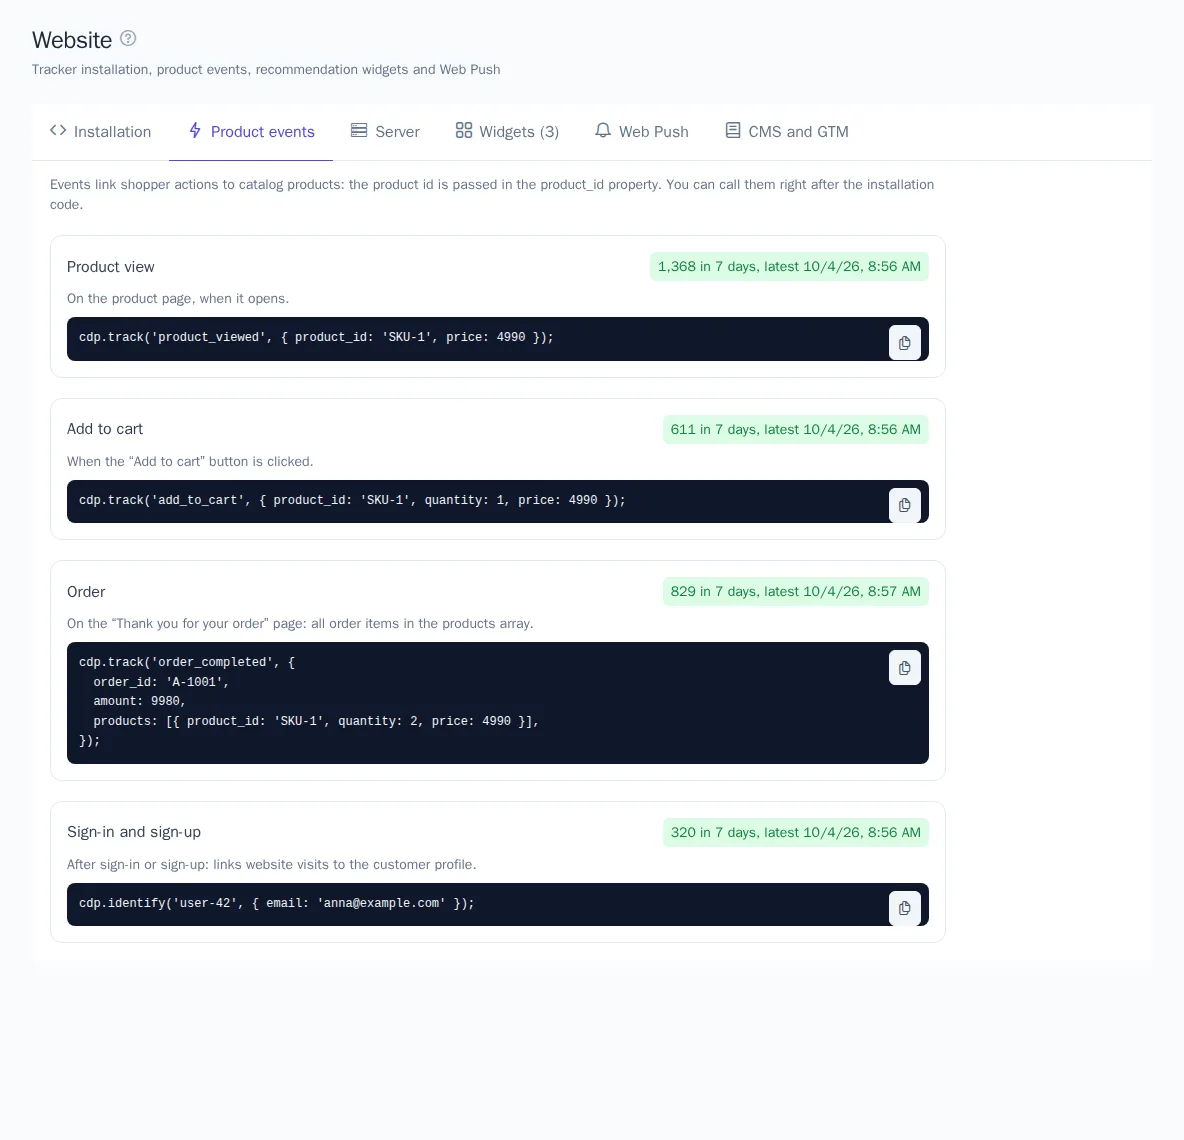
After a sign-in or sign-up, call cdp.identify() with the user's ID in your system, and the visit history will be linked to the customer's profile:
cdp.identify('user-42', { email: '[email protected]' });
Send a User ID only for signed-in users, and don't use shared values like 0 or guest: profiles with the same User ID will be merged. When the user signs out, call cdp.reset() so the next person at that computer gets a new ID.
Product events
The Product events tab shows ready-made calls for four actions: Product view, Add to cart, Order, and Sign-in and sign-up. Event names and the product ID property (product_id by default) come from the Recommendations settings. If no events are selected there, you'll see a warning, and the examples will use the default names: product_viewed, add_to_cart, order_completed.
An order example, with all products sent in the products array:
cdp.track('order_completed', {
  order_id: 'A-1001',
  amount: 9980,
  products: [{ product_id: 'SKU-1', quantity: 2, price: 4990 }],
});
Each step has a status mark: how many events arrived in 7 days and when the latest one came, or No events in 7 days. This shows which calls aren't working yet. The product ID must match the ID in the product catalog.
Orders and sign-ups are more reliable when sent from your server. See Server integration.
Web Push
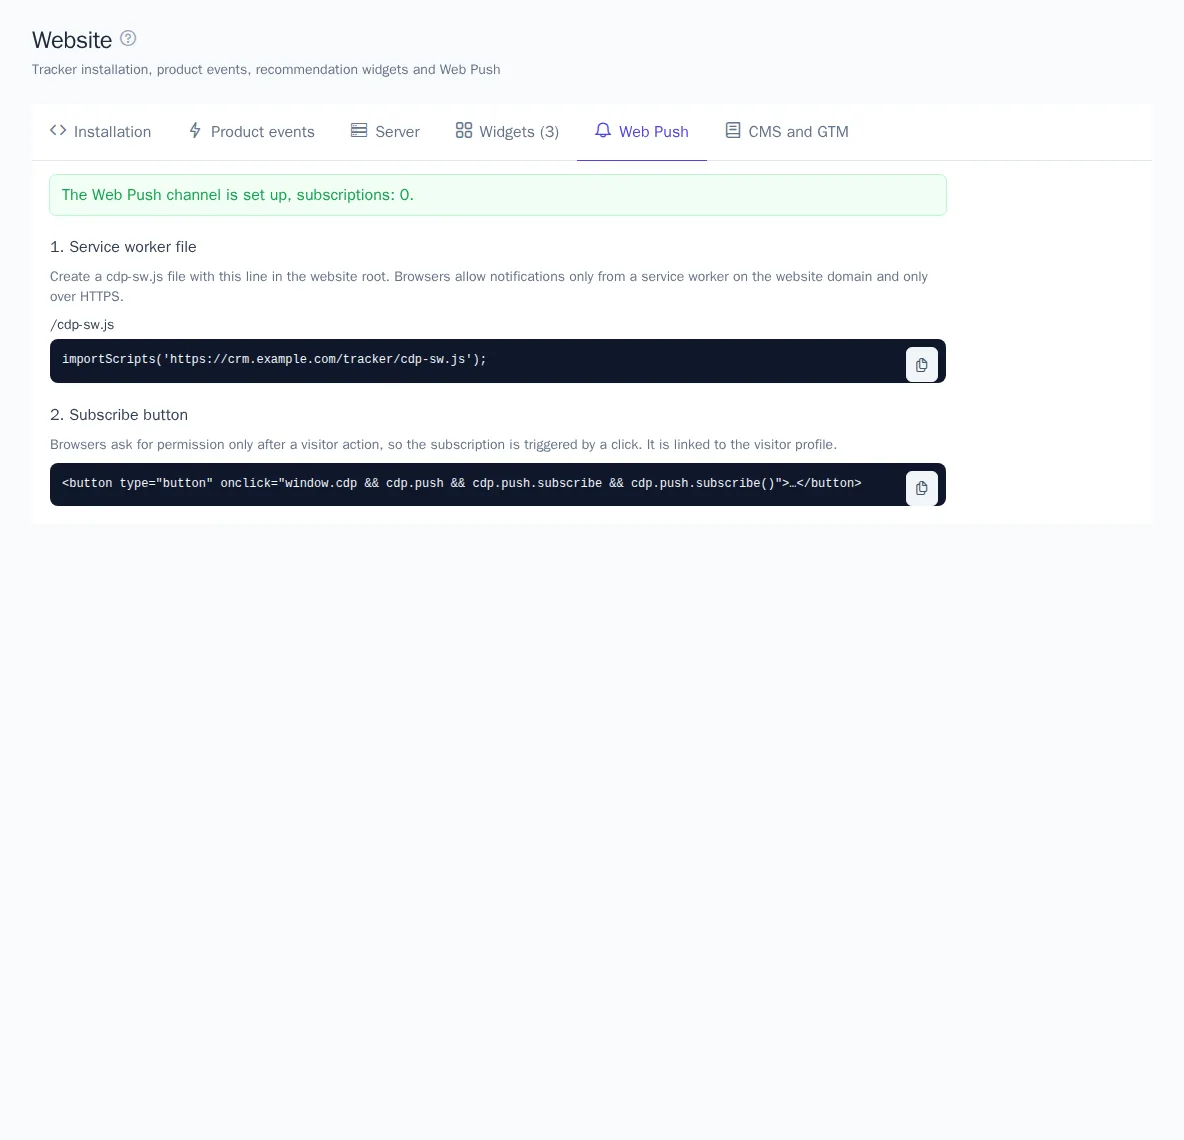
The Web Push tab shows whether the channel is connected and how many subscriptions there are. If there's no channel, create one with the Open integrations link; the keys are generated automatically (see Integrations and channels). Then:
- Service worker file. Create a
cdp-sw.jsfile in the root of your website with a single line:importScripts('https://cdp.onetrace.pro/tracker/cdp-sw.js'); - Subscribe button. Add a button to your website that calls
cdp.push.subscribe()on click. Browsers only ask for notification permission in response to a visitor action.
Notifications only work on websites with HTTPS. The subscription is linked to the visitor's profile.
CMS and Google Tag Manager
The CMS and GTM tab has step-by-step instructions for a custom website, Google Tag Manager, 1C-Bitrix, Tilda, WordPress and WooCommerce, and InSales: where to paste the installation code, events, and widgets.
For example, in Google Tag Manager, create a "Custom HTML" tag with the installation code and the "All Pages" trigger. Product events need separate tags that call cdp.track with triggers on dataLayer events (view_item, add_to_cart, purchase). After publishing the container, check on the Installation tab that events are arriving.
Connecting with an AI agent
If a developer builds your website with an AI agent (Claude Code, Codex, Cursor and others), give the agent a ready-made skill. On the AI agent tab, click Download SKILL.md. The file contains instructions for the agent in English with your project's data: the OneTrace.pro address, the selected write key, product event names, widgets and the Web Push status. With it, the agent adds the install code, product events, sign-in and sign-out, widgets and the notification subscription by itself.
- If there are several write keys, select the one you need.
- Download the file and put it into the website project: for Claude Code —
.claude/skills/<skill name>/SKILL.md, for other agents that support Agent Skills — into their skills folder, for example.agents/skills/<skill name>/SKILL.md. The exact path is shown on the tab. You can also simply attach the file to your message to the agent. - Give the agent a task — there is a sample text on the tab.
Secret keys never go into the skill. If you change the events in the recommendation settings or add widgets, download the skill again.
Good to know
- The tracker collects events and sends them in batches. If the network drops, events are stored in the browser and sent later.
- All website events appear in real time in the Events section.
- Recommendation widgets are set up on the Widgets tab. See Recommendation widgets on your website.