Templates and email builder
A template is a ready-made message for one channel: an email, a Telegram message, an SMS, a Web Push notification, a webhook, and others. The same template is used by journeys, campaigns, and manual sends from the profile card. Variables fill in the customer's name, the order total, and other data.
The section is in the menu under Engagement → Templates. All roles can view templates; Manager and above can create and edit them.
Create a template
- Open Templates. In the top-right corner there's a button for each channel enabled in the project, for example Email or Telegram. Click the one you need.
- Fill in the common fields (see the table below).
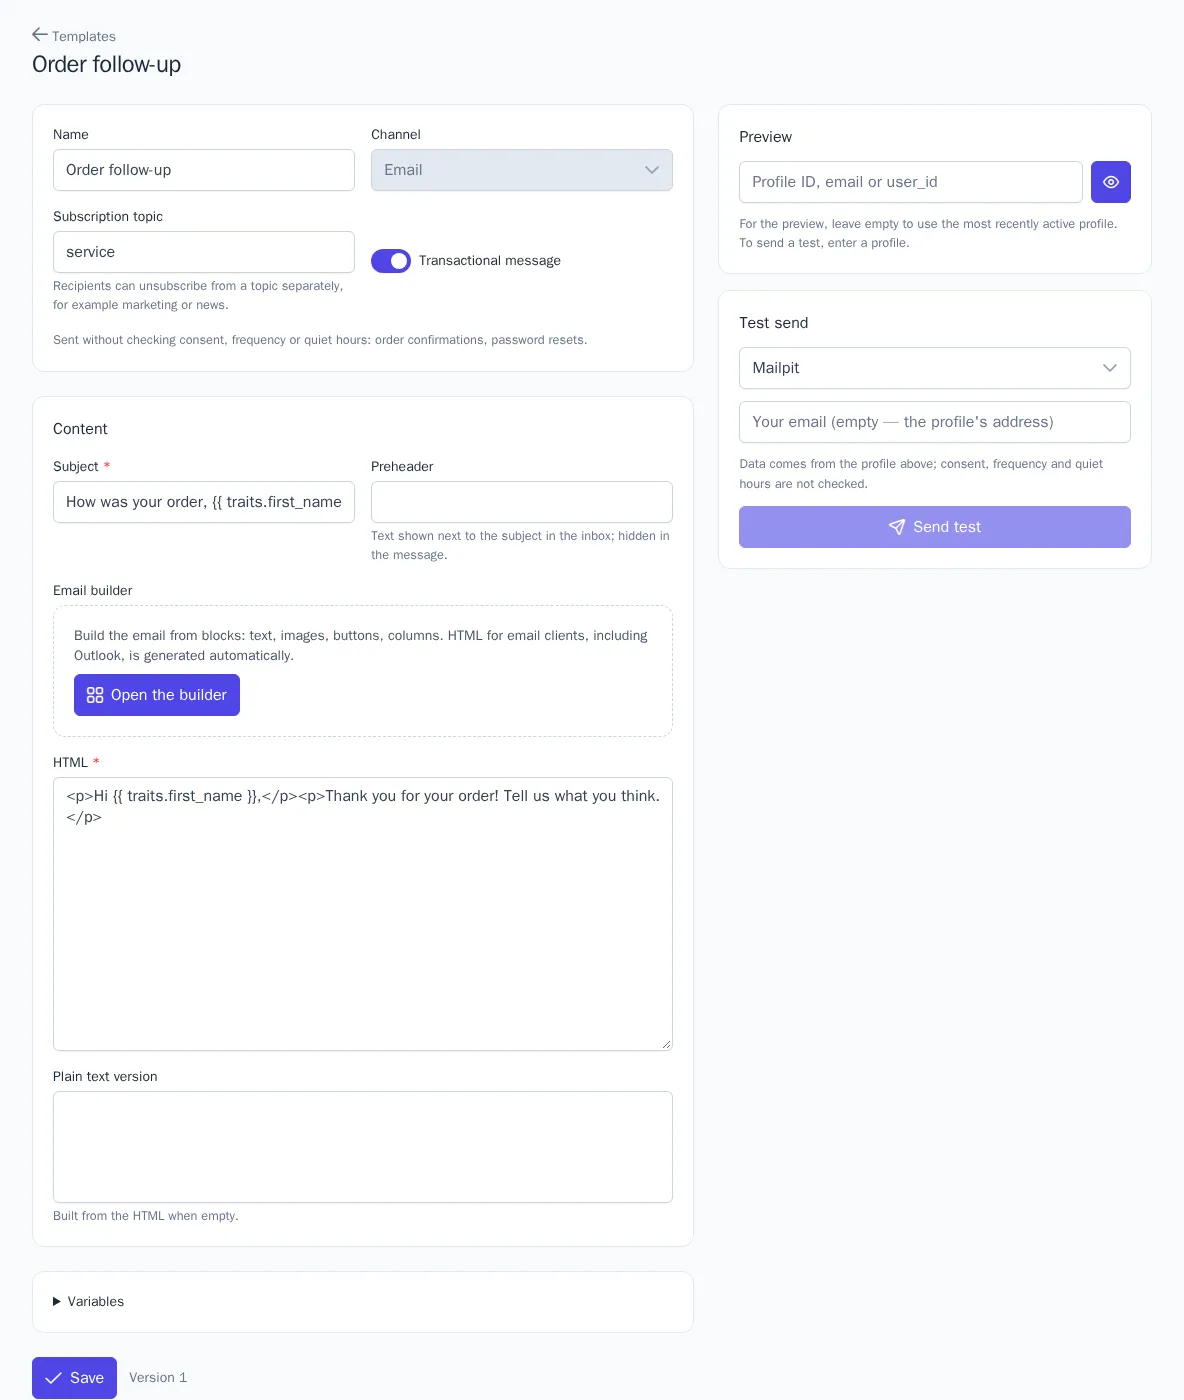
- Fill in the Content block. The fields depend on the channel. For an email, these are the Subject, Preheader (the text shown next to the subject in the inbox), Email builder or HTML, and the Plain text version. If you leave the plain text version empty, it's generated from the HTML.
- Click Save. Each save increases the version number (Version 3).
| Field | What it means |
|---|---|
| Name | Visible only in the interface: in template, journey, and campaign lists |
| Channel | Chosen at creation and can't be changed later |
| Subscription topic | For example, marketing or news. Customers can unsubscribe from just this topic |
| Transactional message | Sent without checking subscription, frequency, or quiet hours. Use it only for order confirmations, password resets, and similar messages |
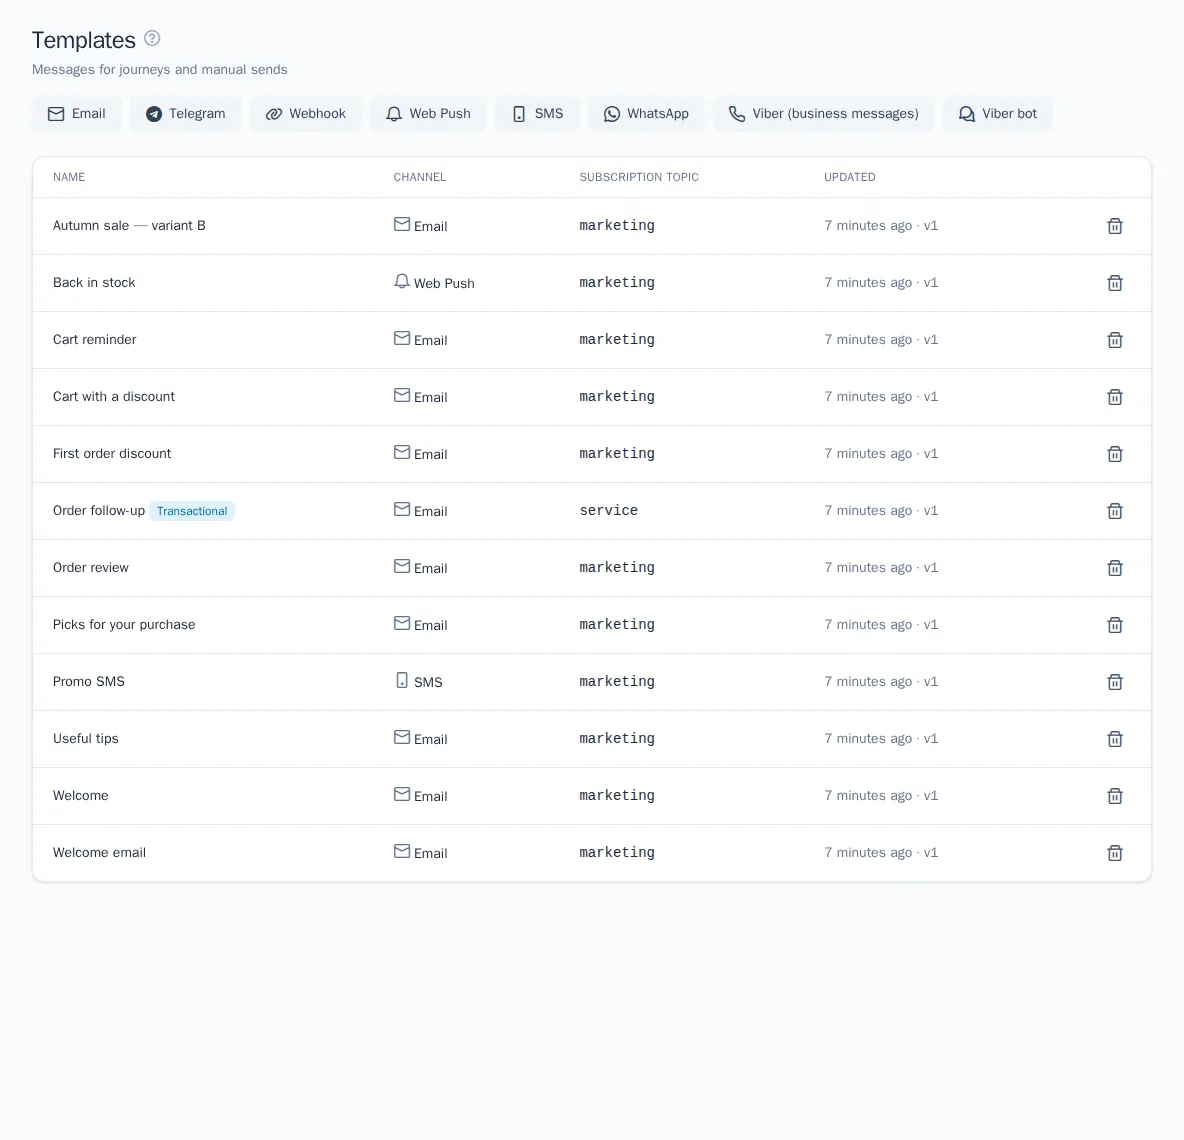
To delete a template, click the trash icon in its row in the list.
Variables
Templates are written in Twig. A variable goes in double curly braces. Expand the Variables block under the content to see the full list with examples.
| Variable | What it inserts |
|---|---|
profile.email, profile.phone, profile.user_id |
Customer identifiers |
traits.first_name and other traits.* |
Profile traits |
event.name, event.properties.amount |
The event that triggered the message |
context.data.*, context.nodes.* |
Journey data: passed on entry through the API, and the Webhook node's response |
project.name, unsubscribe_url |
The project name and the unsubscribe link |
Hello, {{ traits.first_name|default('friend') }}!
{% if event.properties.amount > 5000 %}Delivery is free.{% endif %}
Templates run in a secure sandbox. It supports if conditions, for loops, set, the date, min, and max functions, and filters such as default, date, upper, lower, capitalize, number_format, round, join, replace, striptags, and others. If a variable is missing, an empty string is inserted, so set a default where it matters. If you use a forbidden construct, you'll see the error The template uses a forbidden construct when you save. The rendered message can't exceed 512 KB.
Preview and test send
- In the Preview panel, enter a profile ID, email, or user_id and click the eye icon. If you leave the field empty, data is taken from the most recently active profile.
- For an email, switch between the Desktop, Phone, and Dark mode views.
- In the Test send panel, choose an integration. Enter your own address or chat id; otherwise the message goes to the profile's address. Click Send test: the message status appears under the button.
Test sends are available to Manager and above. Subscription, frequency, and quiet hours aren't checked. The preview has no trigger event, so event.* variables stay empty. If you don't have permission to see personal data, email and phone are masked.
Email builder
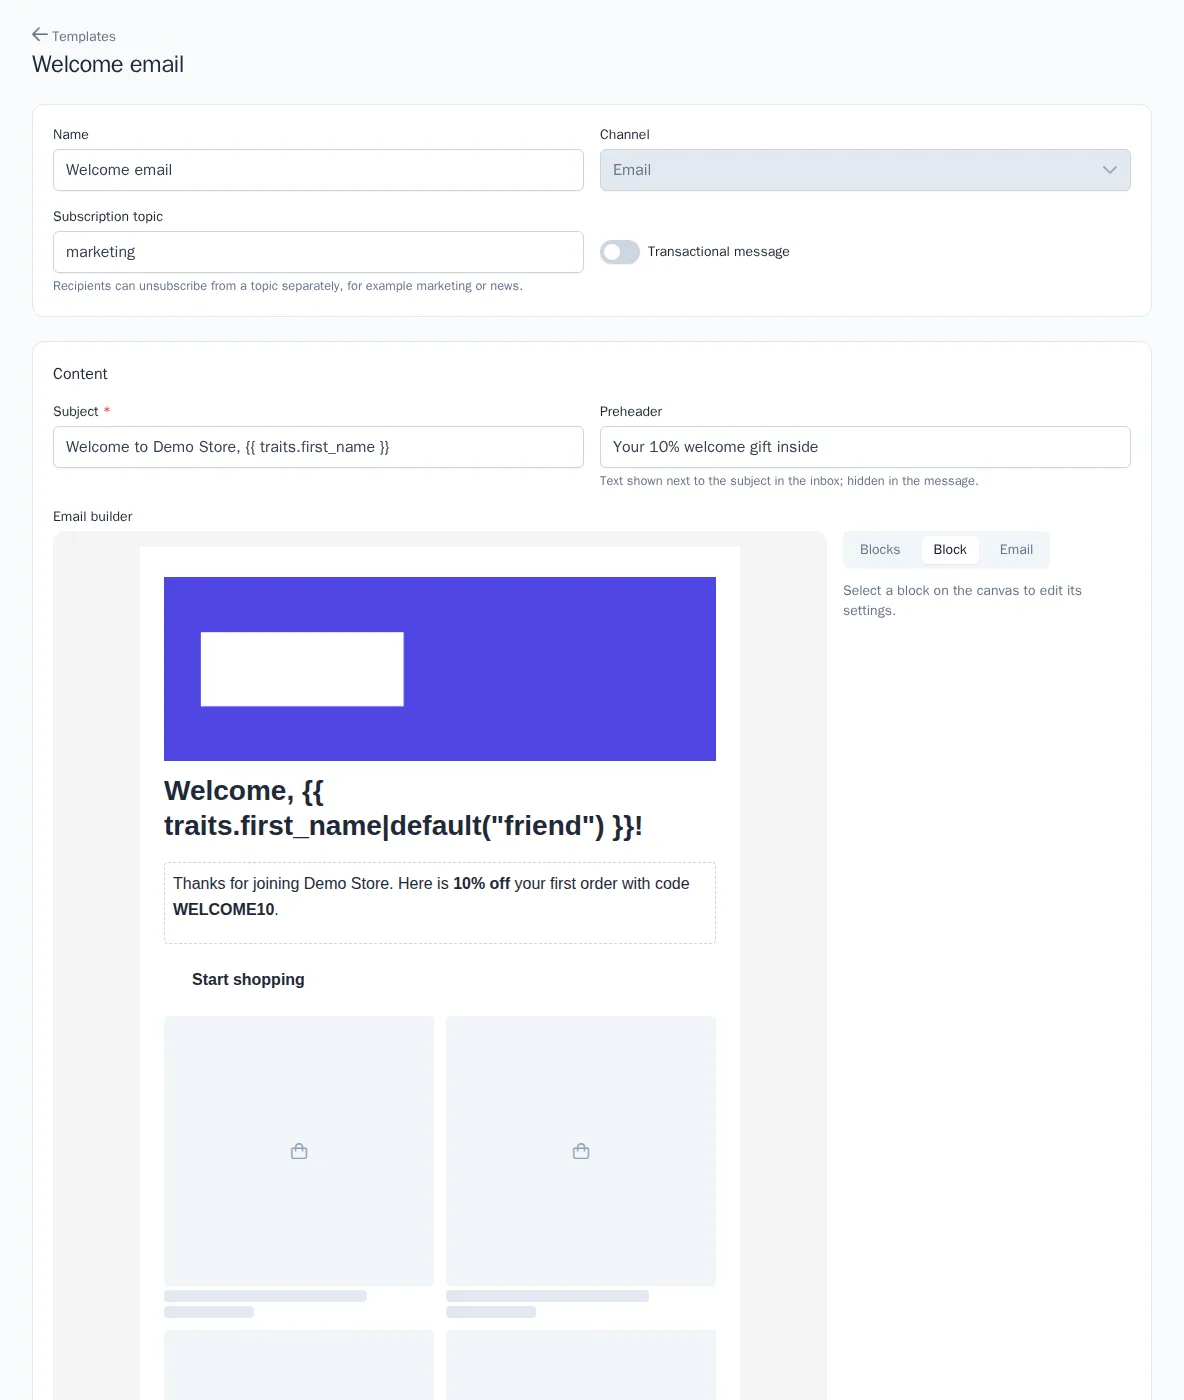
In an email template, click Open the builder in the Email builder field. If the template already has HTML, the builder starts the email from scratch, and the old code is replaced when you save. OneTrace.pro builds the code for email clients, including Outlook and phones, when you save.
To the right of the canvas there are three tabs:
- Blocks: add a block. It's placed after the selected block, or at the end of the email before the footer.
- Block: settings for the block selected on the canvas. You can move blocks up and down, drag, duplicate, and delete them.
- Email: the background, email background, text and link colors, font, email width (480–800 px), padding, and how images are delivered.
| Block | Purpose |
|---|---|
| Heading, Text | Formatted text with variables, for example {{ traits.first_name }} |
| Image | An image from the media library: alt text, link, width 10–100% |
| Button | Text, link, colors, and corner radius |
| Divider, Spacer | A line and empty space |
| Columns | 2–3 columns with headings, text, images, buttons, and spacers. On phones, the columns stack vertically |
| Products | A selection from recommendations: personal, popular, Viewed together, Similar, and so on. You can show 1 to 12 products in 1–4 columns, with a price and a button. If there are no matching products, the block is left out of the email |
| HTML | Your own code as is |
| Footer | Text and the unsubscribe link |
The Switch to HTML button on the Email tab turns the email into plain code. After that, you can't go back to the builder.
Link or attachment
| Link (CDN) | Attached to the email | |
|---|---|---|
| Email size | Light | Larger by the size of the images |
| Display | The image loads when the email is opened. If the mail client blocks images, only the alt text is shown | The image is visible right away |
The default is set in the Default image delivery field on the Email tab. For an individual image, you can change it in the Delivery field. All attachments of one email together can't exceed 1 MB. If public links aren't configured in your installation, only attachments are available.
Media library
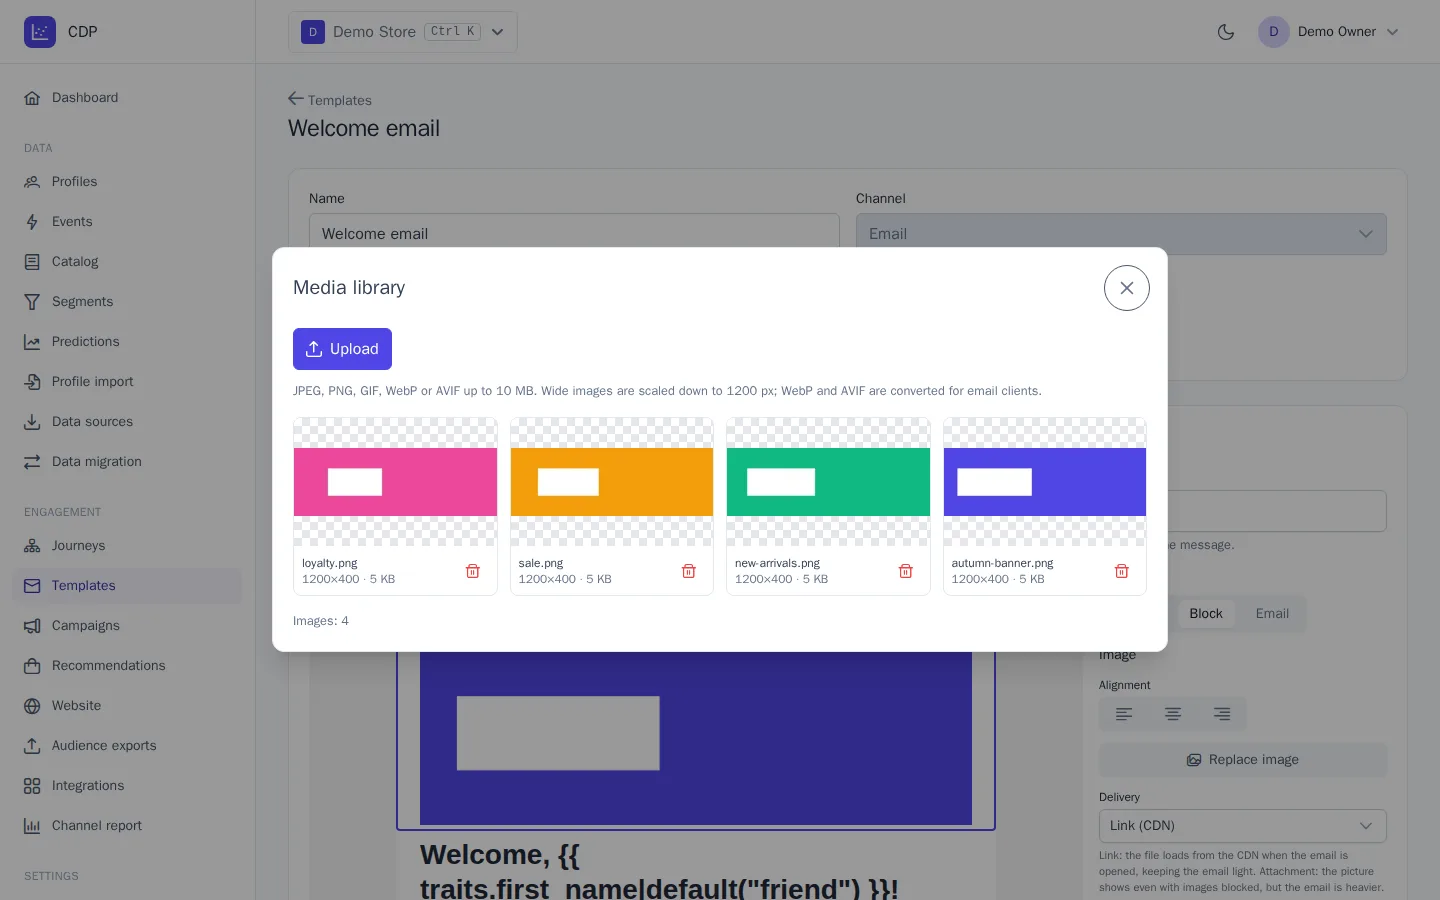
The media library opens when you add an Image block or click Choose image.
- Upload accepts JPEG, PNG, GIF, WebP, and AVIF up to 10 MB. Wide images are scaled down to 1200 px. WebP and AVIF are converted, because not all email clients display them. GIFs are kept as is, including animation.
- Uploading the same file again doesn't create a copy.
- You can't delete an image that's used in a template until you remove it from the template.
- The space taken by images counts toward your plan's limit.