Personal blocks on your website
A personal block is a spot on a page of your website whose content is chosen for each visitor: a banner on the home page, a strip in the catalog, or your own HTML. You show segment members their own content, for example early access for regular customers and a first-order discount for new ones. Everyone else sees the default content, which can have A/B variants. You paste the code into your website once; after that, everything is changed in OneTrace.pro.
Blocks require the installed tracker (Connecting your website) and the Personal blocks on the website plan feature, available from the Growth plan. Members with permission to change the website can create and edit blocks; everyone else sees the blocks and statistics but can't save changes.
Block list
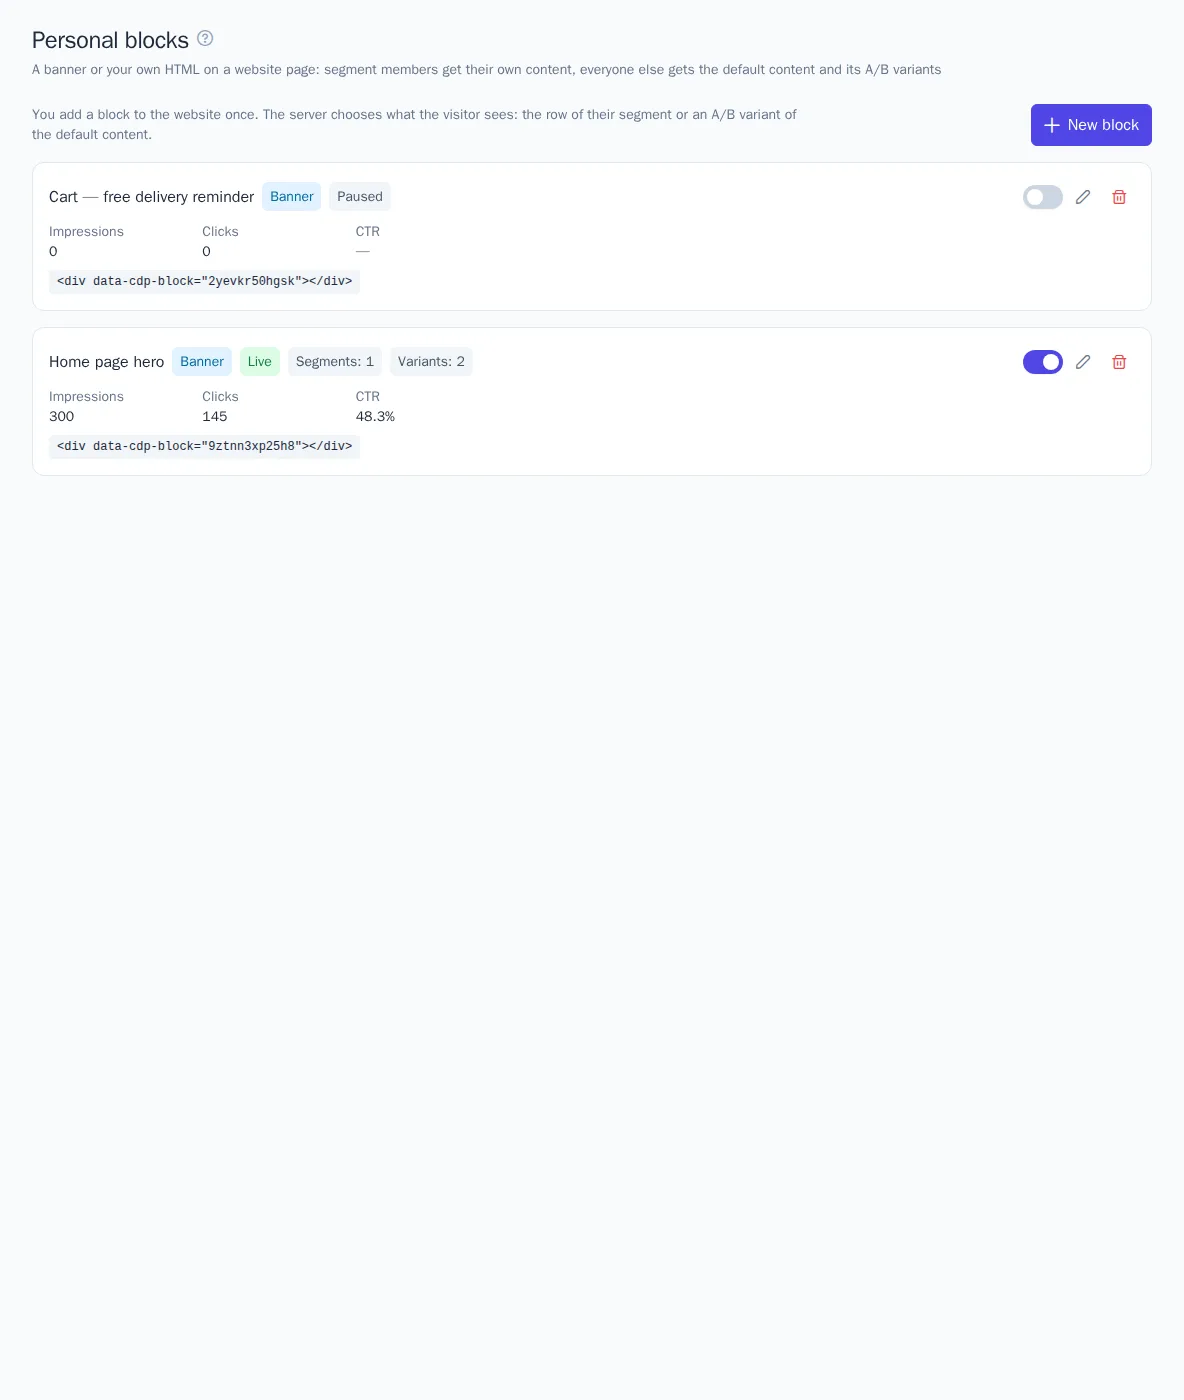
The Website → Personal blocks section shows all blocks of the project: the kind (banner or custom HTML), whether the block is enabled, how many segment rows and variants it has, impressions, clicks, and CTR for 30 days, and the website code. The switch turns a block on and off, and the New block button opens the editor.
Editor
The editor opens as a separate page. On the left are the sections, on the right is a live preview: it renders the block with the same code as on your website. Above the preview, choose the arm (the default content, a variant, or a segment row) and the device: desktop or phone.
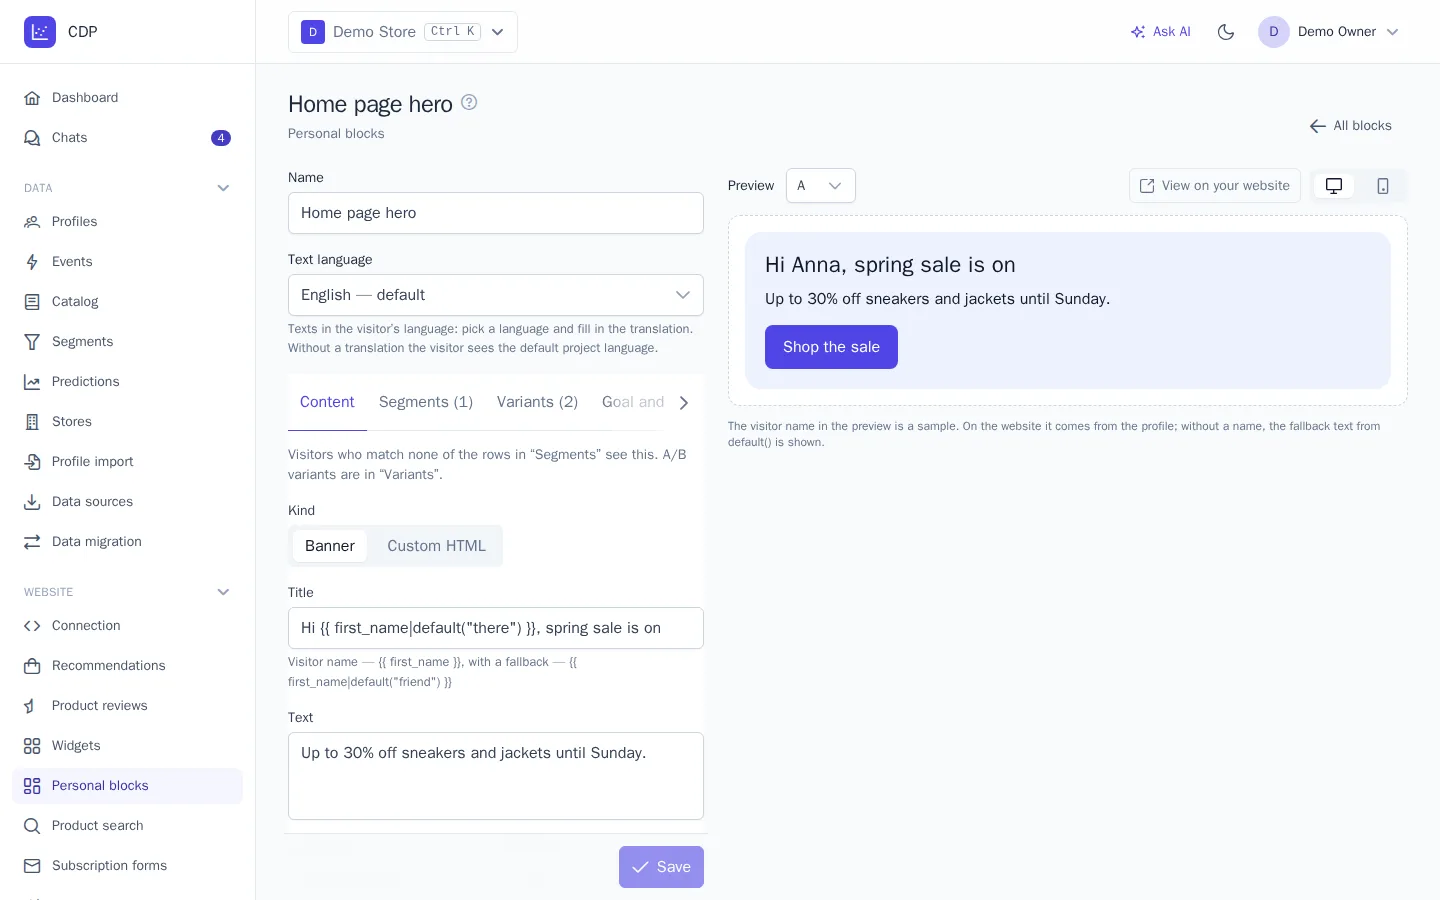
Content is what visitors without their own segment row see:
- Banner: a title, text, a button with a link, an image by https address, and a layout: image on the left, on the right, on top, or as the background. The background, text, and button colors and the corner radius are set in the same section.
- Custom HTML: any markup. On save, scripts, event handlers, forms, and frames are removed from it; images load only over https, and links can be https, http, mailto, tel, or addresses on your website.
- Custom CSS: styles that apply only inside the block. The banner classes are
.cdp-block,.cdp-block__title,.cdp-block__text, and.cdp-block__button.
You can insert the visitor's name into the banner's title, text, and button: {{ first_name }}, or with fallback text, {{ first_name|default("friend") }}. No other profile data is available in the block: the block is requested by the visitor's anonymous ID, and showing contacts or orders based on it isn't safe.
If the project has several languages, choose a language above the sections and fill in the translation of the texts or HTML. The visitor sees the translation closest to their language, and without a translation, the default project language. See Project languages.
Segment rows
In the Segments section, add up to 5 "segment → content" rows. A segment member sees the content of their row. If a visitor is in several segments, the first matching row from the top applies; change the order with the arrows. A visitor without a matching row sees the default content or one of its variants.
The segment is determined by the visitor's profile: an unknown visitor isn't in any segment. Segment membership is recalculated on each segment's schedule; see Segments.
A/B variants
In the Variants section, add up to three variants of the default content: B, C, and D. Visitors without their own segment row are split evenly between A and the variants, and each visitor always sees the same variant. The variant comparison is in the statistics.
Goal and display
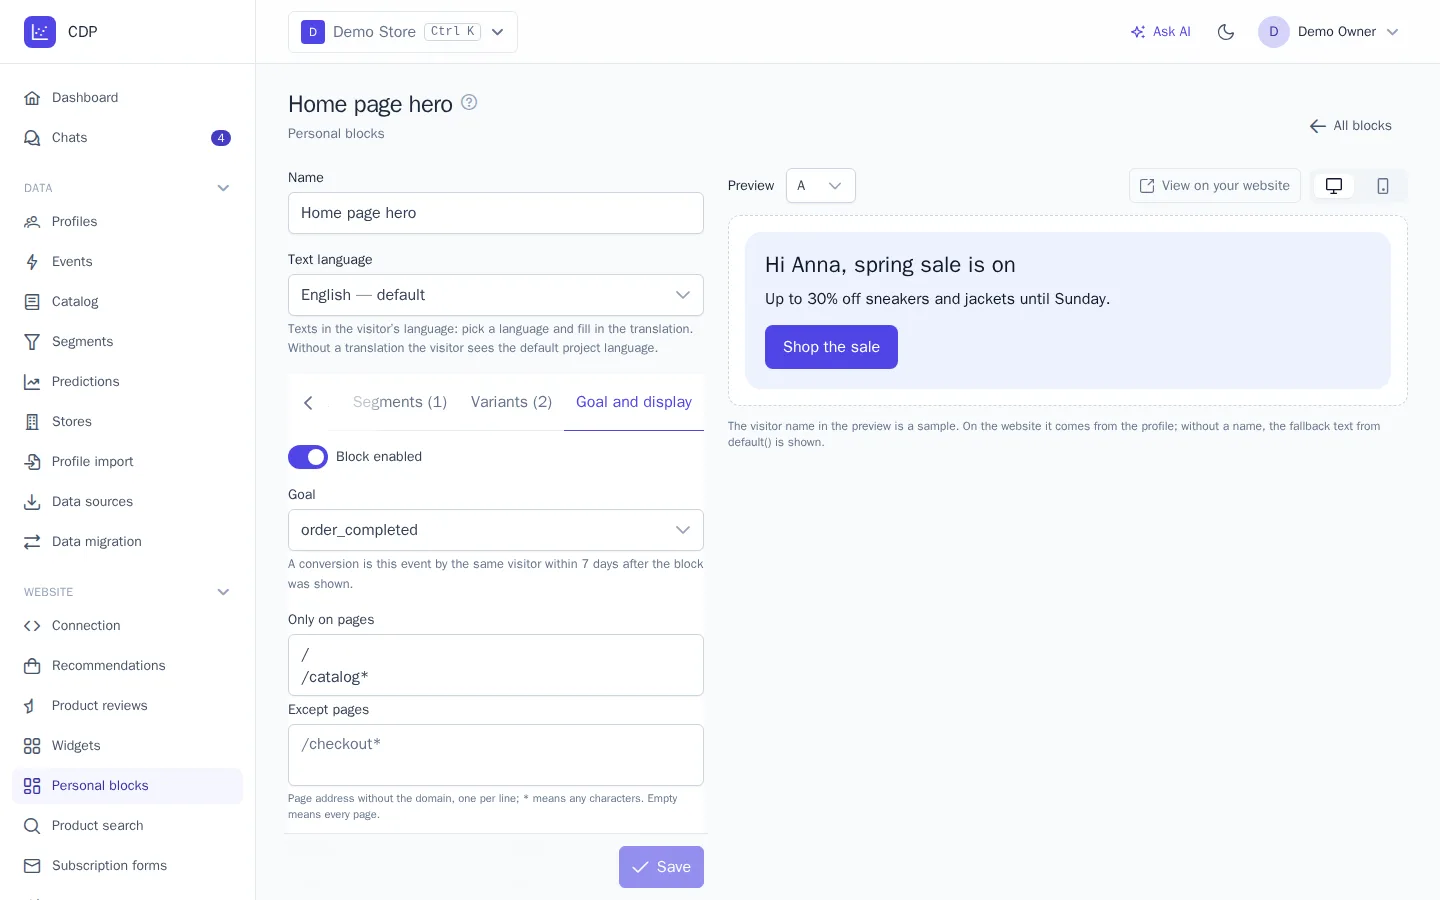
In the Goal and display section:
- Block enabled: a disabled block isn't shown on the website, and its spot on the page stays empty.
- Goal: the event counted as a conversion, a purchase by default. A conversion counts if the visitor performed it within 7 days after the block was shown.
- Display rules: pages (address without the domain,
*matches any characters), devices, new or returning visitors, and segments. They work the same as for widgets. - Website code: appears after the first save.
Website code
Paste the block code into the page template where the block should appear:
<div data-cdp-block="a1b2c3d4e5f6"></div>
The tracker finds the element on its own, both when the page loads and when the element appears later, for example on a single-page website. To re-render blocks manually, call cdp.blocks({ force: true }). The block is rendered in an isolated area of the page (Shadow DOM): your website's styles don't break the block, and the block's styles don't change your website. If the block is disabled or the visitor doesn't match the display rules, the element stays empty.
View on your website opens a page of your website with a preview mark: the block shows the chosen arm, even if it's disabled or outside the display rules. The mark is valid for 24 hours, and impressions and clicks in the preview aren't counted.
Statistics
Below the editor are the statistics for 7, 30, or 90 days: impressions, clicks, CTR, conversions, viewer conversion, and revenue if the goal is the purchase event from the prediction settings. The chart shows the selected metric by day, with a line for each arm; below it is a table of arms, with segment rows listed by name.
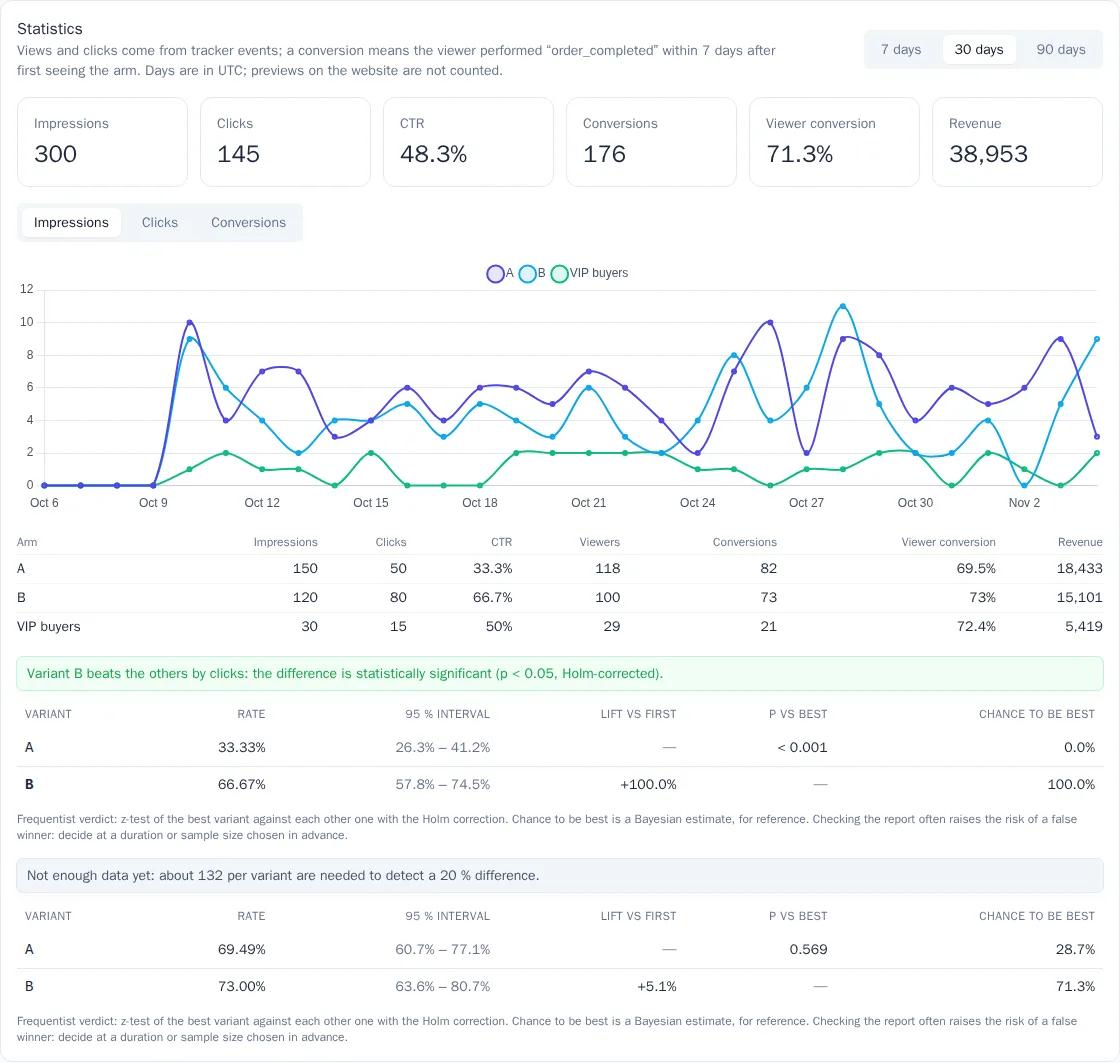
- An impression counts when at least half of the block is visible on the screen, and a click is a click on the block's link. These are the tracker events
block_shownandblock_clickedwith the propertiesblockandarm(the arm:a–dors1–s5). - Viewers are visitors who saw the arm during the period; a conversion means a viewer completed the goal within 7 days after the first impression.
- Variant comparison is by clicks per impression and by viewer conversion, with a statistical significance check, as in A/B tests. Segment rows aren't included in the comparison: different people see them.